Introduction:
Change the lo MTU from 65536 to 16436: [(Doc ID 2041723.1) Recommended for systems with high physical memory to avoid ORA-603]
-- Change the MTU on the fly:
$ ifconfig lo mtu 16436
$ ifconfig lo
-- Change the MTU Permenantly: [To persist after system restart]
$ vi /etc/sysconfig/network-scripts/ifcfg-lo
MTU=16436


$PATCH_LOCATION/30122149/custom/scripts/postpatch.sh -dbhome $ORACLE_HOME


-> Next
"Configuration options"

-> Next


Notes:
- Don't use replay_init_time along with failoverdelay, the service will get created with no errors, but when you try to start it up you will get this weird error:
CRS-2632: There are no more servers to try to place resource 'ora.sprint.pssfztest_gg.svc' on that would satisfy its placement policy
- Stopping one node with failover option: srvctl stop instance -d sprint -i sprint1 -failover
- Stopping of the active node with force option: srvctl stop instance -d sprint -i sprint1 -force
$ vi /u01/oracle/12.2.0.3/network/admin/sqlnet.ora
NAMES.DIRECTORY_PATH= (TNSNAMES, EZCONNECT)
SQLNET.EXPIRE_TIME= 3
SQLNET.ALLOWED_LOGON_VERSION_SERVER=11
Note: starting from 18c SQLNET.ALLOWED_LOGON_VERSION_SERVER is defaulted to 12 which means; in case your applications connects to the DB server via Oracle Client version 11g they will receive the following error:
ORA-28040: No matching authentication protocol
In the above example I'm setting SQLNET.ALLOWED_LOGON_VERSION_SERVER parameter to 11 to allow the applications connecting via Oracle Client version 11 to connect to my 19c DB.
Confirm the interconnect is now pointing to the interconnect NIC:
INST_ID NAME IP_ADDRESS IS_ SOURCE CON_ID
---------- ------------ ---------------- --- ------------------------------- ------
2 eth1 10.110.100.35 NO cluster_interconnects parameter 0
1 eth1 10.110.100.34 NO cluster_interconnects parameter 0
In my setup, I'll be using GoldenGate 12.2.0.1.1 on the source 11g database server.


Create the Network ACLs: [Missed by the import process]
Generate the ACLs using this script on Source 11g DB and execute the output script on Target 19c:
https://oracle-base.com/dba/script?category=script_creation&file=network_acls_ddl.sql


It worth to collect the configuration baseline of your system, it will help track/rollback the changes of OS & DB configurations, this script can help you out:
http://dba-tips.blogspot.com/2016/12/configuration-baseline-script-for-linux.html
In this post, I'll discuss the migration of 11.2.0.3 RAC DB on Oracle Linux 6 to 19.4 RAC on a different cluster on Oracle Enterprise Linux OEL7 using GoldenGate to guarantee zero downtime.
You don't have to be an expert in GoldenGate to get this job done, this post will provide a step by step demonstration which will make it easy for you.
You don't have to be an expert in GoldenGate to get this job done, this post will provide a step by step demonstration which will make it easy for you.
Facts & Certifications:
- Linux OS compatibility: (Doc ID 1304727.2)
If you will install Oracle Linux OEL, the minimum compatible Linux version is OEL 7.4 or later with the following minimum kernels:
UEK5: minimum kernel version = 4.14.35-1818.1.6.el7uek.x86_64 or later UEK 4.14.35 kernels
UEK4: minimum kernel version = 4.1.12-124.19.2.el7uek.x86_64 or later UEK 4.1.12 kernels
If you will install Redhat Linux OEL, the minimum compatible Linux version is RHEL 7.5 or later with the following minimum kernels:
RHCK: minimum kernel version = 3.10.0-862.11.6.el7.x86_64 and later RHCK 3.10.0 kernels
Note: Linux 5 & 6 are not compatible with 19c,Linux 8 is not yet compatible with 19c. So, Only install Linux 7 if your OS is Linux. Update on Jul2021: Oracle included Linux 8 in its compatibility matrix for 19c, and hence it's now compatible.
- Direct in-place upgrade from 11.2.0.3 to 19c is not possible. Golden Gate replication will be used to overcome this limitation.
If you will install Oracle Linux OEL, the minimum compatible Linux version is OEL 7.4 or later with the following minimum kernels:
UEK5: minimum kernel version = 4.14.35-1818.1.6.el7uek.x86_64 or later UEK 4.14.35 kernels
UEK4: minimum kernel version = 4.1.12-124.19.2.el7uek.x86_64 or later UEK 4.1.12 kernels
If you will install Redhat Linux OEL, the minimum compatible Linux version is RHEL 7.5 or later with the following minimum kernels:
RHCK: minimum kernel version = 3.10.0-862.11.6.el7.x86_64 and later RHCK 3.10.0 kernels
Note: Linux 5 & 6 are not compatible with 19c,
- Direct in-place upgrade from 11.2.0.3 to 19c is not possible. Golden Gate replication will be used to overcome this limitation.
- 19.3 Grid & Oracle version will be installed and upgraded to 19.4 through Release Update patch RU which is certified with OEL7.X (Doc ID 1304727.2)
- ACFS on OEL7 needs kernel 4.14.35-1902 or later otherwise its module will not disappear (Doc ID 1369107.1).
- GoldenGate 19c will be installed to replicate the data on the 19c DB which is certified with both 19c DB and OEL7.X
- GoldenGate 12.2.0.1 will be extracting the data from 11.2.0.3 DB, and GoldenGate 19.1.0.0.1 will be applying the data on 19c DB. [This combination is certified]
https://www.oracle.com/technetwork/middleware/ogg-19-1-0-0-0-cert-matrix-5491855.xls
- I'll refer to the old RAC 11g DB cluster as RAC1. while I refer to the new 19c RAC environment [fzppon05vs1n & fzppon06vs1n] as RAC2.
- Why upgrade to 19c not to 18c? Because it's the most supported version by Oracle so far: (Doc ID 742060.1)

Software Download:
[OEL 7.4] https://edelivery.oracle.com [MOS Certification shows the latest certified version is 7.X Doc ID 1304727.2]
[Goldengate 19.1] https://www.oracle.com/middleware/technologies/goldengate-downloads.html [Certified with OEL7]
[Grid 19.3] https://www.oracle.com/technetwork/database/enterprise-edition/downloads/oracle19c-linux-5462157.html
[DB 19.3] https://www.oracle.com/technetwork/database/enterprise-edition/downloads/oracle19c-linux-5462157.html
[RU PATCH 19.4] Oracle Support -> Patches & Updates -> Recommended Patch Advisor "Left side" -> Product "Oracle Database" | Release "19.0.0.0" | Platform "Linux x86_64" -> Search -> Download the latest Release Update "RU" patch (July2019 19.4.0.0.0 found DB RU Patch# 29834717 700MB but I've download the recommended GI RU patch instead which includes GI+DB RU Patch# 29708769 1.7GB).
Legend:
Navy color for COMMANDS.
Gray color for Command OUTPUTS.
Green color for configuration/lines to be edited inside a file.
$ indicates the begining of OS command
SQL> indicates the begining of SQLPLUS command
GGSCI> indicates the begining of GoldenGate command.
OS Preparation:
The rule of thumb for any successful Oracle RAC installation is to make sure you fulfill all the prerequisites before you start the installation.
- Oracle Enterprise Linux 7.4 will be installed.
- SCAN NAME to be set up in the DNS to resolve to 3 IPs my scan name will be rac2-scan.
- The following Oracle Installation related packages should be installed: [Run the command below to verify]
$ rpm -q --qf '%{NAME}-%{VERSION}-%{RELEASE} (%{ARCH})\n' binutils \
compat-libstdc++-33 \
elfutils-libelf \
elfutils-libelf-devel \
gcc \
gcc-c++ \
glibc \
glibc-common \
glibc-devel \
glibc-headers \
ksh \
libaio \
libaio-devel \
libgcc \
libstdc++ \
libstdc++-devel \
make \
sysstat \
unixODBC \
unixODBC-devel \
bc \
compat-libcap1 \
fontconfig-devel \
libXrender \
libXrender-devel \
libX11 \
libXau \
libXi \
libXtst \
libxcb \
net-tools \
nfs-utils \
python \
python-configshell \
python-rtslib \
python-six \
targetcli \
smartmontools \
oracleasm-support
Yum repository to point to Oracle 7 repository:
$ wget http://public-yum.oracle.com/public-yum-ol7.repo
Install oracle-database-preinstall-19c: [This package contains other mandatory packages along with adjusting system parameters to meet the requirement of Oracle installation]
$ yum install -y oracle-database-preinstall-19c
Install missing Oracle packages:
$ yum install -y gcc; yum install -y gcc-c++; yum install -y glibc-devel; yum install -y glibc-headers
$ yum install -y elfutils-libelf-devel; yum install -y gcc; yum install -y gcc-c++; yum install -y kmod-libs; yum install -y kmod
$ yum install -y unixODBC; yum install -y unixODBC-devel; yum install -y dtrace-modules-headers
$ yum install -y fontconfig-devel; yum install -y libXrender-devel; yum install -y librdmacm-devel; yum install -y python-configshell; yum install -y targetcli
$ yum install -y oracleasm-support
OS Users & Groups Setup:
[oracle-database-preinstall-19c will take care of creating most of the groups]
$ groupadd -g 54321 oinstall
$ groupadd -g 54322 dba
$ groupadd -g 54324 backupdba
$ groupadd -g 54325 dgdba
$ groupadd -g 54326 kmdba
$ groupadd -g 54327 asmdba
$ groupadd -g 54328 asmoper
$ groupadd -g 54329 asmadmin
$ groupadd -g 54330 racdba
Note: Oracle user will be the owner of both Grid Infrastructure & DB installations. Sysadmins are usually don't like to touch the ASM, thus they leave this job to the DBA which makes no sense of having a separate user to own the GI installation.
Add Oracle user to all groups:
$ usermod oracle -G dba,asmdba,backupdba,dgdba,kmdba,racdba,asmadmin,asmdba,asmoper
Un-limit the password expiry time for oracle user:
$ chage -M 9999 oracle
User Profile:
$ vi /home/oracle/.bash_profile
if [ -f ~/.bashrc ]; then
. ~/.bashrc
fi
PATH=$PATH:$HOME/.local/bin:$HOME/bin
export PATH
export GRID_HOME=/u01/grid/12.2.0.3
export ORACLE_HOME=/u01/oracle/12.2.0.3
export ORACLE_BASE=/u01/oracle
PATH=$PATH:$ORACLE_HOME/bin:$ORACLE_HOME/OPatch; export PATH
LD_LIBRARY_PATH=$ORACLE_HOME/lib:/lib:/usr/lib; export LD_LIBRARY_PATH
CLASSPATH=$ORACLE_HOME/JRE:$ORACLE_HOME/jlib:$ORACLE_HOME/rdbms/jlib; export CLASSPATH
export TMP=/tmp
export TEMP=$TMP
export TMPDIR=$TMP
alias ll='ls -rtlh'
alias asm='. /home/oracle/setasm'
Environment script to login to ASM on Node1:
$ vi /home/oracle/setasm
export GRID_HOME=/u01/grid/12.2.0.3
export ORACLE_HOME=$GRID_HOME
export ORACLE_SID=+ASM1
export PATH=$PATH:$GRID_HOME/bin
alias sql="$GRID_HOME/bin/sqlplus '/ as sysasm'"
Environment script to login to ASM on Node2:
$ vi /home/oracle/setasm
export GRID_HOME=/u01/grid/12.2.0.3
export ORACLE_HOME=$GRID_HOME
export ORACLE_SID=+ASM2
export PATH=$PATH:$GRID_HOME/bin
alias sql="$GRID_HOME/bin/sqlplus '/ as sysasm'"
Network Settings: [All Nodes]
$ vi /etc/hosts
127.0.0.1 localhost localhost.localdomain localhost4 localhost4.localdomain4
::1 localhost localhost.localdomain localhost6 localhost6.localdomain6
# Public
10.100.23.44 fzppon05vs1n.preprod.flydubai.com fzppon05vs1n rac2-n1 n1
10.100.23.45 fzppon06vs1n.preprod.flydubai.com fzppon06vs1n rac2-n2 n2
# Virtual
10.100.23.54 fzppon05vs1n-vip1.preprod.flydubai.com fzppon05vs1n-vip1 n1-vip
10.100.23.55 fzppon06vs1n-vip2.preprod.flydubai.com fzppon06vs1n-vip2 n2-vip
# Private
10.110.100.34 fzppon05vs1n-priv1.preprod.flydubai.com fzppon05vs1n-priv1 n1-priv
10.110.100.35 fzppon06vs1n-priv2.preprod.flydubai.com fzppon06vs1n-priv2 n2-priv
NOZEROCONF Setup:
$ vi /etc/sysconfig/network
# Add this parameter for NOZEROCONF
NOZEROCONF=yes
Immune /etc/resolv.conf from getting changed after server reboot:
$ cp /etc/resolv.conf /root/resolv.conf
$ chattr +i /etc/resolv.conf
Change the lo MTU from 65536 to 16436: [(Doc ID 2041723.1) Recommended for systems with high physical memory to avoid ORA-603]
-- Change the MTU on the fly:
$ ifconfig lo mtu 16436
$ ifconfig lo
-- Change the MTU Permenantly: [To persist after system restart]
$ vi /etc/sysconfig/network-scripts/ifcfg-lo
# Add this parameter for MTU
System Settings: [All Nodes]
Adjust the following Kernel Parameters: [RAC Servers] [oracle-database-preinstall-19c will set most of the parameters except the following]
$ vi /etc/sysctl.conf
kernel.sem = 250 32000 100 200
kernel.shmall = 4294967296
net.core.wmem_max = 134217728
fs.aio-max-nr = 3145728
net.ipv4.conf.default.rp_filter = 2
# Add the following new parameters:
vm.max_map_count = 262144
# For Big PGA:
vm.dirty_background_ratio = 5
vm.dirty_ratio = 10
Resource Limits: [All Nodes]
$ vi /etc/security/limits.conf
# Add the following parameters:
oracle soft nofile 131072
oracle hard nofile 131072
oracle soft nproc 131072
oracle hard nproc 131072
oracle soft core unlimited
oracle hard core unlimited
oracle soft memlock 220200960
oracle hard memlock 220200960
oracle soft stack 10240
oracle hard stack 32768
Note: memlock (is in KB) = 210GB in above setting. maybe you don't need that much but always make sure that memlock is always bigger than the SGA size of your instance to allow a single process to use that much of memory.
Disable SELinux: [Machine restart is required after]
$ vi /etc/selinux/config
SELINUX=disabled
Disable Firewall:
In order to avoid having a "Verifying Multicast check ...FAILED (PRVG-11138)" error during Grid installation, you have to disable the firewall.
$ systemctl stop firewalld
$ systemctl disable firewalld
$ systemctl status firewalld
NTP Configuration:
In order to avoid having "Verifying Network Time Protocol (NTP) ...FAILED (PRVG-1063)" error during Grid installation you have to disable NTP to let Cluster Time Synchronization Service "CTSS" to take over syncing the time automatically between nodes:
$ systemctl stop ntpd
$ systemctl disable ntpd.service
$ systemctl status ntpd
$ mv /etc/ntp.conf /etc/ntp.conf.original
$ mv /etc/chrony.conf /etc/chrony.conf.original
$ rm /var/run/ntpd.pid
Stop avahi-daemon:
$ systemctl stop avahi-daemon
$ systemctl disable avahi-daemon
$ systemctl status avahi-daemon
Server Restart: [Recommended]
$ sync;sync;sync; init 6
Check the status of SELinux and make sure it's not active:
$ sestatus
$ getenforce
ASM Setup: [Both Nodes]
Install RPM: [Only if NOT done above]
$ yum install -y oracleasm-support
Configure ORACLEASM: [All Nodes]
[By root]
$ oracleasm configure -i
Default user to own the driver interface []: oracle
Default group to own the driver interface []: asmdba
Start Oracle ASM library driver on boot (y/n) [n]: y
Scan for Oracle ASM disks on boot (y/n) [y]:
Writing Oracle ASM library driver configuration: done
Load the ASM module:
$ /usr/sbin/oracleasm init
ASM Disks Creation: [From One Node only]
Disk Formatting: [For each disk]
$ fdisk /dev/xvdr
p
n
p
1
<Enter>
<Enter>
w
Do the same for the rest of the disks...
ASM Disk Labeling:
[OCR/VOTE disks]
$ oracleasm createdisk SPRINT_OCR_VOTE_DISK1 /dev/xvdr1
$ oracleasm createdisk SPRINT_OCR_VOTE_DISK2 /dev/xvds1
$ oracleasm createdisk SPRINT_OCR_VOTE_DISK3 /dev/xvdt1
[DATA disks]:
$ oracleasm createdisk SPRINT_DATA_DISK1 /dev/xvdj1
$ oracleasm createdisk SPRINT_DATA_DISK2 /dev/xvdk1
$ oracleasm createdisk SPRINT_DATA_DISK3 /dev/xvdl1
$ oracleasm createdisk SPRINT_DATA_DISK4 /dev/xvdm1
$ oracleasm createdisk SPRINT_DATA_DISK5 /dev/xvdn1
[RECO disks]:
$ oracleasm createdisk SPRINT_RECO /dev/xvdd1
[REDO disks]:
$ oracleasm createdisk SPRINT_REDO /dev/xvde1
list all ASM disks:
$ oracleasm listdisks
Refresh the list of disks on the other RAC Nodes:
$ oracleasm scandisks
$ oracleasm listdisks
Grid Infrastructure (RAC) 12.2.0.3 (19c) installation:
Configure VNC: [By root user]
$ cat /etc/sysconfig/vncservers
VNCSERVERS="2:root 3:oracle"
VNCSERVERARGS[2]="-geometry 1280x1024"
VNCSERVERARGS[3]="-geometry 1280x1024"
$ service vncserver start
[By Oracle user]
$ vncpasswd
<Enter the VNC password>
$ vncserver :1
Create the software location tree: [By root]
GRID_HOME will be /u01/grid/12.2.0.3
ORACLE_HOME will be /u01/oracle/12.2.0.3
The place where software binaries will be staged /u02
Note: Do not use symbolic links when creating ORACLE_BASE or ORACLE_HOME for 19c, otherwise you will not be able to create the database later due to the following cute error:
ORA-20002: Directory creation failed
ORA-06512: at "SYS.DBMS_QOPATCH", line 1644
ORA-06512: at "SYS.DBMS_QOPATCH", line 1521
ORA-06512: at line 1
[On all RAC Nodes]
$ mkdir -p /u01/oraInventory
$ mkdir -p /u01/grid/12.2.0.3
$ mkdir -p /u01/oracle/12.2.0.3
$ chmod -R 775 /u01
$ chown oracle:oinstall /u01 -R
Change the binary files ownership:mkdir /u02
$ chown -R oracle:oinstall /u02
Stage Software Binaries: [on One Node only]
[By root]
Download the binaries under /u02
Unzip the binaries of Grid Infrastructure under GRID_HOME and the binaries of Database software under ORACLE_HOME:
[One Node only]
$ unzip LINUX.X64_193000_grid_home.zip -d /u01/grid/12.2.0.3
$ unzip LINUX.X64_193000_db_home.zip -d /u01/oracle/12.2.0.3
$ chown -R oracle:oinstall /u01
Run cluvfy utility: [From any node]
[By oracle]
$ cd /u01/grid/12.2.0.3
$ ./runcluvfy.sh stage -pre crsinst -n fzppon05vs1n,fzppon06vs1n -verbose
You can safely ignore the following failures:
User Equivalence
Swap Size
resolv.conf Integrity
RPM Package Manager database
Login to VNC session [by root] from VNC viewer [Jump Server]
10.100.23.44:1
Disbale the screen lock for more convenient: [Enable it back after the installation]
[GUI] Applications -> System tools -> Settings -> Privacy -> Screen Lock -> Disable "Automatic Screen lock".
$ xhost +
$ su - oracle
$ export DISPLAY=localhost:1.0
$ cd /u01/grid/12.2.0.3
$ sh gridSetup.sh
Check "Configure Oracle Grid Infrastructure for a New Cluster"
->Next "Cluster Configuration"
Check "Configure an Oracle Standalone Cluster"
-> Next "Grid Plug and Play"
Select: Create Local Scan
Cluster Name: sprint
SCAN Name: rac2-scan
SCAN Port: 1521
-> Next "Cluster Node Information"
Edit
Public Hostname: fzppon05vs1n
Virtual Hostname: fzppon05vs1n-vip1
Add
Public Hostname: fzppon06vs1n
Virtual Hostname: fzppon06vs1n-vip2
SSH Connectivity
Enter OS Password for oracle
Click Setup
-> OK
-> Next "Network Interface Usage"
eth0 Use for "Public"
eth1 Use for "ASM & Private"
any other NIC "Do Not Use"
-> Next "Storage Option"
Select: "Use Oracle Flex ASM for storage"
-> Next "Create Grid Infrastructure Management Repository Option"
Select: "No"
-> Next "Create ASM Disk Group"
Disk group name: SPRINT_OCR_VOTE
Redundancy: Normal
Change Discovery Path: /dev/oracleasm/disks
Under "Select Disks"
Select /dev/oracleasm/disks/SPRINT_OCR_VOTE_DISK1
/dev/oracleasm/disks/SPRINT_OCR_VOTE_DISK2
/dev/oracleasm/disks/SPRINT_OCR_VOTE_DISK3
-> Next "ASM Password"
Select: "Use Same passwords for these accounts"
-> "Yes" for a weak password
-> Next "Failure Isolation"
Select "Do not use Intelligent Platform Management Interface (IPMI)
-> Next "Management Options"
Don't select anything (I don't have an EM agent installed yet)
-> Next "Operating System Groups"
Oracle ASM Administrator (OSASM) Group "asmadmin"
Oracle ASM DBA (OSDBA for ASM) Group "asmdba"
Oracle ASM Operator (OSOPER for ASM) Group (Optional) "asmoper"
-> Next "Installation Location"
Oracle base: /u01/oracle
Software location: /u01/grid/12.2.0.3
-> Yes "To confirm the selection of Oracle base path which is not empty"
-> Next "Create Inventory"
Inventory Directory "/u01/oraInventory"
-> Next "Root script execution"
Don't select anything (we will run the root script ourselve)
-> Next
Check "Ignore All" to ignore the following checks:
Swap Size
resolv.conf integrity
RPM Package Manager database
-> Yes "To confirm to continue"
-> Next -> Save Response File
-> Install
After a while [depends on your servers power] you will be prompted to run root.sh script:
-> Go to the shell prompt and Run orainstRoot.sh on RAC2-N1 on RAC2-N2:
[By root]
$ /u01/oraInventory/orainstRoot.sh
-> Run root.sh on RAC2-N1 once it completed run it on RAC2-N2: [Don't run in parallel]
[By Root]
$ export TMP=/tmp; export TEMP=$TMP; export TMPDIR=$TMP
$ /u01/grid/12.2.0.3/root.sh
Enter the full pathname of the local bin directory: [/usr/local/bin]:
Node1 output:
Node2 output:
-> After the successful execution of root.sh script on both nodes go back to the Installer and click "OK"
-> Oracle Cluster verification utility failed at the end because of ntp service check error which can be ignored without impacting the RAC setup.
-> Close
Validate the Clusterware Setup by running cluvfy: [RAC2-N1]
[By Grid owner which is oracle]
$ cd /u01/grid/12.2.0.3
$ ./runcluvfy.sh stage -post hwos -n fzppon05vs1n,fzppon06vs1n -verbose
[All checks passed]
In case you had any problems during the Grid Infrastructure installation you can consult the following logfiles:
[Log File] /u01/oracle/diag/crs/fzppon05vs1n/crs/trace/ocrconfig_xxxx.trc
[Param File] /u01/grid/12.2.0.3/crs/install/crsconfig_params
Also, In case you want to roll back and remove the installation and start from scratch, you can follow these steps to DE-INSTALL a failure Grid Infrastructure installation:
[Both Nodes] # export GRID_HOME=/u01/grid/12.2.0.3
[Both Nodes] # $GRID_HOME/bin/crsctl stop resource -all
[Both Nodes] # $GRID_HOME/bin/crsctl stop has
[Node1 By Root] # # $GRID_HOME/crs/install/rootcrs.sh -deconfig -force
[Node1 By Grid owner] # $GRID_HOME/oui/bin/runInstaller -detachHome -silent ORACLE_HOME=$GRID_HOME
[Node2 By Root] # $GRID_HOME/crs/install/rootcrs.sh -deconfig -force
[Node2 By Grid owner] # $GRID_HOME/oui/bin/runInstaller -detachHome -silent ORACLE_HOME=$GRID_HOME
[Both Nodes By Root] # rm -rf $GRID_HOME/*
# rm -rf $GRID_HOME/.*
# rm -rf /u01/oraInventory/*
# rm -rf /u01/oracle/*
# rm -f /etc/oracle/ocr.loc
# rm -f /etc/init.d/init.ohasd
# rm -f /etc/inittab.crs
# rm -rf /etc/oracle
# rm -f /usr/tmp/.oracle/*
# rm -f /tmp/.oracle/*
# rm -f /var/tmp/.oracle/*
# rm -f /etc/oratab
# rm -rf /var/opt/oracle
Not needed: Re-create ORACLE_BASE & GRID_HOME tree.
Overwrite the headers of ASM OCR Disk:
[Node1 by Root]
# dd if=/dev/zero of=/dev/oracleasm/disks/SPRINT_OCR_VOTE_DISK1 bs=1024 count=100
# dd if=/dev/zero of=/dev/oracleasm/disks/SPRINT_OCR_VOTE_DISK2 bs=1024 count=100
# dd if=/dev/zero of=/dev/oracleasm/disks/SPRINT_OCR_VOTE_DISK3 bs=1024 count=100
Recreate the ASM disks:
# oracleasm deletedisk /dev/oracleasm/disks/SPRINT_OCR_VOTE_DISK1
# oracleasm deletedisk /dev/oracleasm/disks/SPRINT_OCR_VOTE_DISK2
# oracleasm deletedisk /dev/oracleasm/disks/SPRINT_OCR_VOTE_DISK3
[Both Nodes] # oracleasm scandisks
[Node1]
# oracleasm createdisk SPRINT_OCR_VOTE_DISK1 /dev/xvdr1
# oracleasm createdisk SPRINT_OCR_VOTE_DISK2 /dev/xvds1
# oracleasm createdisk SPRINT_OCR_VOTE_DISK3 /dev/xvdt1
[Both Nodes] # oracleasm scandisks; oracleasm listdisks
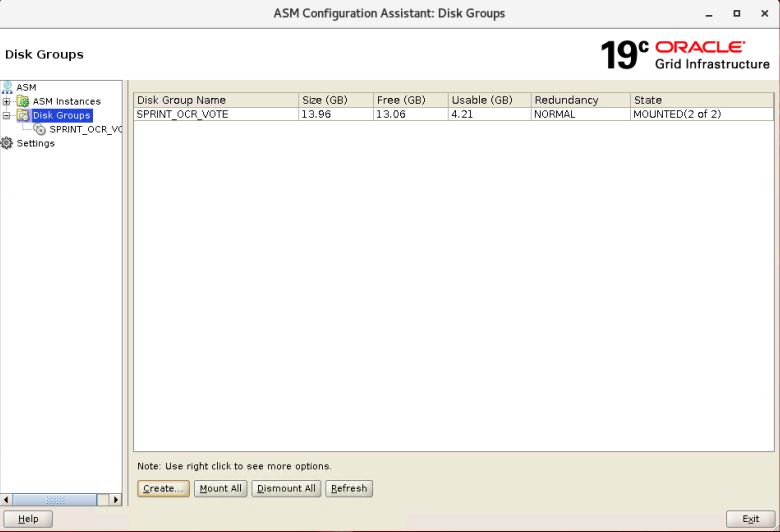
After a successful RAC installation, you will need to create the ASM disk groups that will host the database file.
ASM Diskgroups Creation:
[By grid owner which is oracle in my setup]
It's recommended to use ASM Configuration Assistant GUI tool(asmca) for this task:
$ $GRID_HOME/bin/asmca
In case you will use the Command line method instead of ASMCA:
[From ASM instance]
$ sqlplus "/ as sysasm"
SQL> CREATE DISKGROUP SPRINT_DATA EXTERNAL REDUNDANCY
DISK '/dev/oracleasm/disks/SPRINT_DATA_DISK1' SIZE 461577M
DISK '/dev/oracleasm/disks/SPRINT_DATA_DISK2' SIZE 461577M
DISK '/dev/oracleasm/disks/SPRINT_DATA_DISK3' SIZE 461577M
DISK '/dev/oracleasm/disks/SPRINT_DATA_DISK4' SIZE 461577M
DISK '/dev/oracleasm/disks/SPRINT_DATA_DISK5' SIZE 461577M
ATTRIBUTE 'compatible.asm'='19.0.0.0','compatible.rdbms'='19.0.0.0','au_size'='4M';
SQL> CREATE DISKGROUP SPRINT_REDO1 EXTERNAL REDUNDANCY
DISK '/dev/oracleasm/disks/SPRINT_REDO' SIZE 123976M
ATTRIBUTE 'compatible.asm'='19.0.0.0','compatible.rdbms'='19.0.0.0','au_size'='4M';
SQL> CREATE DISKGROUP SPRINT_REDO2 EXTERNAL REDUNDANCY
DISK '/dev/oracleasm/disks/SPRINT_REDO_NEW' SIZE 109671M
ATTRIBUTE 'compatible.asm'='19.0.0.0','compatible.rdbms'='19.0.0.0','au_size'='4M';
SQL> CREATE DISKGROUP SPRINT_RECO EXTERNAL REDUNDANCY
DISK '/dev/oracleasm/disks/SPRINT_RECO' SIZE 348090M
ATTRIBUTE 'compatible.asm'='19.0.0.0','compatible.rdbms'='19.0.0.0','au_size'='4M';
-- This diskgroup will hold the ACFS file system which will host goldengate installation/trail files:
SQL> CREATE DISKGROUP SPRINT_GG EXTERNAL REDUNDANCY
DISK '/dev/oracleasm/disks/SPRINT_RECO_NEW' SIZE 329016M
ATTRIBUTE 'compatible.asm'='19.0.0.0','compatible.rdbms'='19.0.0.0','au_size'='4M';
# Mount the diskgroup on the OTHER ASM instance, only if CLI was used to create the diskgroups: [Node2]
SQL> ALTER DISKGROUP SPRINT_DATA MOUNT;
ALTER DISKGROUP SPRINT_REDO1 MOUNT;
ALTER DISKGROUP SPRINT_REDO2 MOUNT;
ALTER DISKGROUP SPRINT_RECO MOUNT;
Ref: In case you are curious about the features the DB will benefit out of advancing compatible.rdbms, check this link:
ACFS Filesystem Creation:
In this task we will Create a new shared ACFS file system on both RAC nodes to hold the goldengate installation/trail files, the new file system mount poitn name will be /cloudfs on disk: RAC1_PSS_GG_DISK1 ...
We will be creating a shared ACFS filesystem between both RAC nodes to host GoldenGate installation/trail files. Oracle only supports two shared filesystems for the purpose of hosting GoldenGate files ACFS & DBFS. In this setup, we will use ACFS which is more reliable.
For creating an ACFS filesystem first you need to create an ASM diskgroup and then create the ACFS filesystem over it. Please remember that we already created this diskgroup SPRINT_GG in the "ASM Diskgroups Creation" section.
First Check if the OS is supported and ACFS drivers are installed/loaded:
[By Grid owner "oracle"]
$ cd /u01/grid/12.2.0.3/bin/
$ ./acfsdriverstate -orahome /u01/grid/12.2.0.3 supported
ACFS-9200: Supported
$ ./acfsdriverstate -orahome /u01/grid/12.2.0.3 installed
ACFS-9203: true
$ ./acfsdriverstate -orahome /u01/grid/12.2.0.3 loaded
ACFS-9203: true
ACFS Configuration Using GUI tool ASMCA:
[By oracle]
$ asmca
In this task we will Create a new shared ACFS file system on both RAC nodes to hold the goldengate installation/trail files, the new file system mount poitn name will be /cloudfs on disk: RAC1_PSS_GG_DISK1 ...
1-Create New Disk Group PSS_GG [External].. already done above.
2-On the left side menu, click on Volumes:
On the right side click Create->
Volume Name: GG_VOLUME
Diskgroup Name: PSS_GG diskgroup
Target Size: 320 out of the full size 321 [In production keep 15% of free space o avoid getting the thresholds fired]
Click OK
3-On the left side menu, click on ACFS File Systems:
On the right side click Create->
Type of ACFS: Cluster File System
Mount point: /cloudfs
Check "Auto Mount"
User Name: oracle
Group Name: oinstall
Volume: GG_VOLUME
Don't check "Automatically run configuration commands"
You will be prompted to run the following script [by root from Node1 only]:
$ /u01/oracle/cfgtoollogs/asmca/scripts/acfs_script.sh
In case you will use the command line instead of using GUI ASMCA tool, follow these steps:
[By oracle]
Create ACFS Command:
$ /sbin/mkfs -t acfs /dev/asm/gg_volume-106
[By root] [Node1 Only]
$ /u01/grid/12.2.0.3/bin/srvctl add filesystem -d /dev/asm/gg_volume-106 -m /cloudfs -u oracle -fstype ACFS -autostart ALWAYS
$ /u01/grid/12.2.0.3/bin/srvctl start filesystem -d /dev/asm/gg_volume-106
$ chown oracle:oinstall /cloudfs
$ chmod 775 /cloudfs
$ /u01/grid/12.2.0.3/bin/srvctl add filesystem -d /dev/asm/gg_volume-106 -m /cloudfs -u oracle -fstype ACFS -autostart ALWAYS
$ if [ $? = "0" -o $? = "2" ]; then
/u01/grid/12.2.0.3/bin/srvctl start filesystem -d /dev/asm/gg_volume-106
if [ $? = "0" ]; then
chown oracle:oinstall /cloudfs
chmod 775 /cloudfs
/u01/grid/12.2.0.3/bin/srvctl status filesystem -d /dev/asm/gg_volume-106
exit 0
else
exit $?
fi
/u01/grid/12.2.0.3/bin/srvctl status filesystem -d /dev/asm/gg_volume-106
fi
Oracle Database 12.2.0.3 (19c) installation:
[By root] [Both Nodes]
$ chmod 775 /u01/oracle -R
[From a VNC session]
$ xhost +
$ su - oracle
$ export DISPLAY=localhost:1.0
$ cd /u01/oracle/12.2.0.3
$ ./runInstaller
"Configuration Option"
Check "Setup Software Only"
-> Next
"Database Installation Options"
Check "Oracle Real Application Clusters database installation"
-> Next
"Nodes Selection"
Make sure selecting both nodes.
-> Next
"Database Edition"
Select "Enterprise Edition" <Or whatever the edition you are licensed to use>
-> Next
"Installation Location"
-> Oracle Base: /u01/oracle
Software Location: /u01/oracle/12.2.0.3
-> Next
"Operating System Groups"
Leave the defaults:
Database Administrator (OSDBA) group: dba
Database Operator (OSOPER) group (Optional): oper
Database Backup and Recovery (OSBACKUPDBA) group: backupdba
Data Guard Administrative (OSDGDBA) group: dgdba
Encryption Key Management administrative (OSKMDBA) group: kmdba
Real Application Clusters administrative (OSRACDBA) group: racdba
-> Next
Click "Yes" to confirm to continue although oracle user is not part of oper group.
"Root Script Execution"
-> Next "To continue with running root script manually"
"Prerequisite Checks"
Check "Ignore All" to safely ignore the following
- Swap Size
- Task resolv.conf Integrity
If "Clock Synchronization" NTP related warnings appear, enable Cluster Time Sync Service CTSS instead of NTP: [On both Nodes By root]
$ systemctl stop ntpd
$ systemctl disable ntpd.service
$ mv /etc/ntp.conf /etc/ntp.conf.original
$ mv /etc/chrony.conf /etc/chrony.conf.original
$ rm /var/run/ntpd.pid
$ $GRID_HOME/bin/cluvfy comp clocksync -n all -verbose
Click "Yes" to continue the installation ignoring the warnings.
-> Install
-> Run root.sh script by root user [First on Node1 then on Node2]
$ /u01/oracle/12.2.0.3/root.sh
-> Go back to the GUI installer and click "OK"
-> Click "Close"
Apply latest Release Update RU Patch (GRID + DB)
RU Patche Download:
Download OPatch 12.2.0.1.17 [Search MOS for Patch# 6880880] ... Already coming with 19.3
Download Oct-2019 GI RU Patch 30116789 [Grid + Database 19.5.0.0.0]
Download Oct-2019 GI RU Patch 30116789 [Grid + Database 19.5.0.0.0]
RU Patch Installation:
Validate opatch utility on all GRID & DB homes:
[By grid software owner]
$ $GRID_HOME/OPatch/opatch lsinventory -detail -oh $GRID_HOME
[By database software owner]
$ $ORACLE_HOME/OPatch/opatch lsinventory -detail -oh $ORACLE_HOME
Unzip the patch under new directory: [On BOTH NODES] {Will need 3.4GB of disk space}
$ mkdir -p /u01/oracle/RU_PATCHES
$ cd /u02
$ unzip -d /u01/oracle/RU_PATCHES p30116789_190000_Linux-x86-64.zip
$ chown -R oracle:oinstall /u01/oracle/RU_PATCHES
Check if any current installed one-off patches conflict with each interim patch inside the RU: [this check will run again during the patch apply]
For Grid Infrastructure Home:
[By grid software owner]
$ export ORACLE_HOME=$GRID_HOME
$ export PATCH_LOCATION=/u01/oracle/RU_PATCHES/30116789
$ $ORACLE_HOME/OPatch/opatch prereq CheckConflictAgainstOHWithDetail -phBaseDir $PATCH_LOCATION/30122149
$ $ORACLE_HOME/OPatch/opatch prereq CheckConflictAgainstOHWithDetail -phBaseDir $PATCH_LOCATION/30122167
$ $ORACLE_HOME/OPatch/opatch prereq CheckConflictAgainstOHWithDetail -phBaseDir $PATCH_LOCATION/30125133
For Database home:
[By database software owner]
$ export ORACLE_HOME=$ORACLE_HOME
$ export PATCH_LOCATION=/u01/oracle/RU_PATCHES/30116789
$ $ORACLE_HOME/OPatch/opatch prereq CheckConflictAgainstOHWithDetail -phBaseDir $PATCH_LOCATION/30122149
$ $ORACLE_HOME/OPatch/opatch prereq CheckConflictAgainstOHWithDetail -phBaseDir $PATCH_LOCATION/30125133
$ $ORACLE_HOME/OPatch/opatch prereq CheckConflictAgainstOHWithDetail -phBaseDir $PATCH_LOCATION/30125133
Note: You can also use "My Oracle Support Conflict Checker" tool to check for patch conflict on your environment, it will let you upload your OPatch inventory outputs and check for any conflicting patches.
Patch Apply: [Node1 then Node2] [Downtime will occur on the local node]
1. Patch Grid Home: 30min [clusterware & DB will restart automatically on the local node]
A. Unmount the ACFS file systems: [By root user]
[RAC2-N1]
[By root]
$ /sbin/acfsutil registry
$ fuser -mv /cloudfs
$ kill -9 <PID>
$ /bin/umount -t acfs -a
$ /sbin/acfsutil info fs
B. Patch Apply: [Automatic method]
[By root]
[WARNING: there will be NO confirmation message once you run below opatchauto command!]
$ export PATCH_LOCATION=/u01/oracle/RU_PATCHES/30116789
Automatic Method:
$ $GRID_HOME/OPatch/opatchauto apply $PATCH_LOCATION -oh $GRID_HOME
...
[Log will be saved under /u01/grid/12.2.0.3/cfgtoollogs/opatchauto/]
If prompted "A system reboot is recommended before using ACFS" then a reboot must be issued before continuing. otherwise ACFS\ADVM\OKS driver will not be patched.
In case you want to apply the patches one by one instead of applying them automatically the use the below Manual Method:
[As ROOT]
$GRID_HOME/crs/install/rootcrs.sh -prepatch
Stop clusterware: # crsctl stop cluster
[As GRID OWNER]
# export PATCH_LOCATION=/u01/oracle/RU_PATCHES/30116789
$GRID_HOME/OPatch/opatch apply -oh $GRID_HOME -local $PATCH_LOCATION/30122149
$GRID_HOME/OPatch/opatch apply -oh $GRID_HOME -local $PATCH_LOCATION/30122167
$GRID_HOME/OPatch/opatch apply -oh $GRID_HOME -local $PATCH_LOCATION/30125133
[As ROOT]
$GRID_HOME/crs/install/rootcrs.sh -postpatch
C. Make sure ACFS file system is mounted on local node:
$ /sbin/acfsutil info fs
$ /bin/mount <mount-point>
2. Patch ORACLE Home: 20min [All DB instances will restart automatically on local node]
[By root]
WARNING: there will be NO confirmation message once you run below opatchauto command!
$ export PATCH_LOCATION=/u01/oracle/RU_PATCHES/30116789
$ $ORACLE_HOME/OPatch/opatchauto apply $PATCH_LOCATION -oh $ORACLE_HOME
[On the rest RAC Nodes]
Repeat the same Patching steps [1-3] of GRID_HOME patching and ORACLE_HOME patching on the other nodes in the cluster.
In case you want to apply the patches one by one instead of applying them automatically the use the below Manual Method:
[As ORACLE OWNER]
# export PATCH_LOCATION=/u01/oracle/RU_PATCHES/30116789
$PATCH_LOCATION/30122149/custom/scripts/prepatch.sh -dbhome $ORACLE_HOME
Stop all Databases the runs from ORACLE_HOME:
# srvctl stop database -d xxx
$ORACLE_HOME/OPatch/opatch apply -oh $ORACLE_HOME -local $PATCH_LOCATION/30122149
$ORACLE_HOME/OPatch/opatch apply -oh $ORACLE_HOME -local $PATCH_LOCATION/30125133
$PATCH_LOCATION/30122149/custom/scripts/postpatch.sh -dbhome $ORACLE_HOME
Start back all Databases:
# srvctl start database -d xxx
Verify the patch apply:
----------------------
$ $GRID_HOME/OPatch/opatch lsinventory
$ $GRID_HOME/bin/crsctl query crs releasepatch
$ sqlplus -version
SQL> select * from gv$version;
Patch Rollback: [In case of rollback for any reason]
1. Unmount the ACFS file systems: [By root user]
# /sbin/acfsutil registry
# fuser -mv /cloudfs
# kill -9 <PID>
# /bin/umount -t acfs -a
# /sbin/acfsutil info fs
2. Rollback GRID Home: [Clusterware & All DB instances will restart automatically on local node]
-- -------------------
[By root]
# $GRID_HOME/OPatch/opatchauto rollback /u01/oracle/RU_PATCHES/30116789 -oh $GRID_HOME
If the message, "A system reboot is recommended before using ACFS is shown" then a reboot must be issued before continuing. otherwise ACFS\ADVM\OKS driver will not be patched.
B. Make sure ACFS file system is mounted on local node:
# /sbin/acfsutil info fs
# /bin/mount <mount-point>
3. Rollback ORACLE Home: [All DB instances will restart automatically on local node]
-- --------------------
[By root]
# $ORACLE_HOME/OPatch/opatchauto rollback /u01/oracle/RU_PATCHES/30116789 -oh $ORACLE_HOME
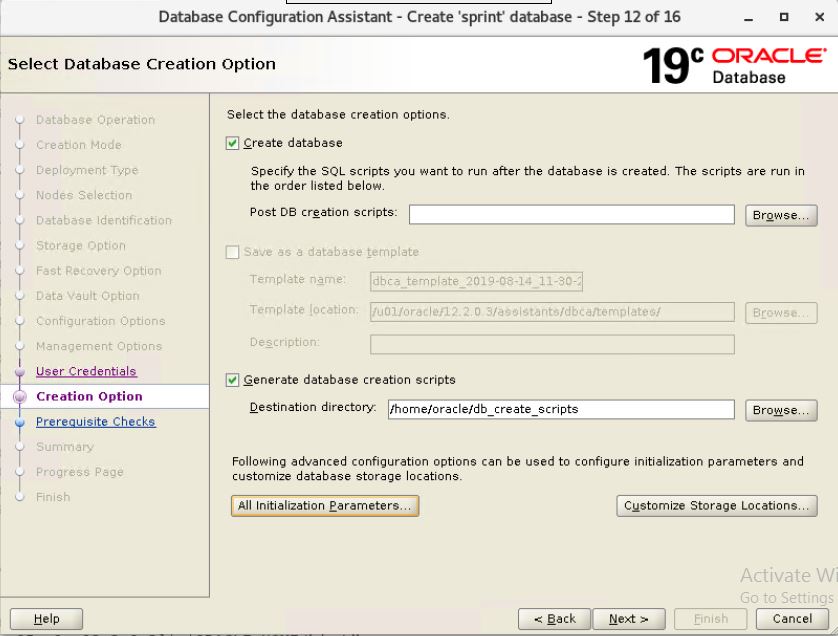
Database Creation:
We will create a blank 19c database using DBCA GUI tool:
[From a VNC session]
$ xhost +
$ su - oracle
$ export DISPLAY=localhost:1.0
$ /u01/oracle/12.2.0.3/bin/dbca
"Database Operation"
Select "Create a database"
-> Next
"Creation Mode"
Select "Advanced configuration"
-> Next
"Deployment Type"
Database type: Oracle Real Application Cluster (RAC) database
Configuration type: Admin Managed
Template Name: General Purpose or Transaction Processing
-> Next
"Nodes Selection"
Make sure all nodes are selected
-> Next
"Database Identification"
Global database name: sprint
SID prefix: sprint
Un-check "create as Container database"
-> Next
"Storage Option"
Accept the defaults:
Database Storage type: Automatic Storage Management (ASM)
Database Files location:+SPRINT_DATA/{DB_UNIQUE_NAME}
Check "Use Oracle Managed Files (OMF)"
Multiplex redo logs and control files ...
1 +SPRINT_REDO1
2 +SPRINT_REDO2
Click "OK"
-> Next
"Fast Recovery option"
Check "Specify Fast Recovery Area"
Recovery files storage Type: Automatic Storage Management (ASM)
Fast Recovery Area: +SPRINT_RECO
Fast Recovery Area size: 300 GB
Un-Check "Enable archiving"
-> Next
"Data Vault option"
Un-check all

-> Next
"Configuration options"
Memory: Check "Use Automatic Shared Memory Management" 60% of all system memory in my setup.
Sizing: Processes: 6500
Character Set: AL32UTF8
Connection mode: Dedicated server mode
Sample schemas: Un-check "Add sample schemas to the database"
-> Next
Uncheck "Run Cluster Verification Utility (CVU) check periodically
Uncheck "Configure Enterprise Manager (EM) database express

-> Next
Check "Use the same administrative password for all accounts" <For the purpose of simplicity>
-> Next
Check "Create database"
Check "Generate database creation scripts"
Destination directory: /home/oracle/db_create_scripts
Customize Storage Locations ...
Edit Control Files:
Maximum Datafiles: 1024
MAXLOGFILES: 250
MAXLOGHISTORY 58400
Redo Log Groups:
Remove group 3,4
Modify file size to 1G for groups 1,2
Add groups 3,4,5 with file size 1G for Thread 1
Add groups 6,7,8,9,10 with file size 1G for Thread 2


-> Next
"Prerequisite Checks"
Check "Ignore All" to safely ignore the following
- Swap Size

-> Next
Click "Yes" to continue the installation and ignore the warnings.
-> Finish
-> Password Management
Change the password for sys & system
-> Close
Deploy DBA BUNDLE on both nodes [In case you are using it]
Create Services for the application connectivity:
I've many applications and I used to create a service for each application, this way it will be easy for the DBA to manage each application connection.
$ srvctl add service -database sprint -service pssfztest_avail,pssfztest_ent,pssfztest_gmp,pssfztest_edf,pssfztest_api,pssfztest_apiota,pssfztest_web,pssfztest_apiro,pssfztest_ns,pssfztest_int,pssfztest_prl,pssfztest_ext,pssfztest_rpt,pssfztest_gg,pssfztest_pmw,pssfztest_sup,pssfztest_dcs,pssfztest_dcsmsgs,pssfztest_dcscore,pssfztest_sched,pssfztest_config,pssfztest_irops,pssfztest_reaccom -preferred sprint1,sprint2 -tafpolicy BASIC -failovertype TRANSACTION -commit_outcome TRUE -failovermethod BASIC -failoverretry 100 -stopoption IMMEDIATE -session_state DYNAMIC -role PRIMARY -policy AUTOMATIC -clbgoal long -verbose -failover_restore LEVEL1 -replay_init_time 1800 -notification TRUE
$ srvctl start service -database sprint
Notes:
- Don't use replay_init_time along with failoverdelay, the service will get created with no errors, but when you try to start it up you will get this weird error:
CRS-2632: There are no more servers to try to place resource 'ora.sprint.pssfztest_gg.svc' on that would satisfy its placement policy
- clbgoal=short is less stable than clbgoal=long where failover retries can fail before it reaches its max limit.
- clbgoal=short balance the sessions between RAC nodes based on response time, while clbgoal=long balance the sessions based on the number of sessions on each node.
- The PRECONNECT option for -tafpolicy parameter is deprecated.
- If you set -failovertype = TRANSACTION for enabling DML failover (Application Continuity) then you must set -commit_outcome to TRUE.
- For -session_state Oracle recommends to set it to DYNAMIC for most applications, to use default session settings (NLS settings, optimizer preferences,..) after the session fails over.
- replay_init_time: Specifies the time in seconds after which replay (failover) will not happen. [It's set to 1800sec=30 minutes above]
- Applications should not use the default database service (which has the same name as DB_NAME/DB_UNIQUE_NAME of the database) as this service is not supported by the high availability features.
- Applications should not use EZCONNECT as it has no high availability capabilities.
- In order for applications to use the DML failover feature (Application Continuity), application users should be granted execute permission on DBMS_APP_CONT: [For simplicity I'm granting it for everyone but some applications may not work properly with this feature, so it's recommended to test your applications and grant this permission to the users of the applications that support Application Continuity feature]
SQL> grant execute on DBMS_APP_CONT to public;
SQL> grant execute on DBMS_APP_CONT to public;
The following activities will cause the transaction to failover without being disrupted [transaction will hang for a few seconds]:
- instance crash.
- OS kill -9 of the instance main processes (i.e. PMON/SMON).
- OS kill -STOP followed by kill -9 of the same session.
- shutdown immediate (from SQLPLUS console of the active instance).
- shutdown abort (from SQLPLUS console of the active instance).
- ALTER SYSTEM KILL SESSION command.
- ALTER SYSTEM DISCONNECT SESSION command.
- Stopping the service in one node gracefully: srvctl stop service -d sprint -i sprint1
- Stopping the service in one node forcefully: srvctl stop service -d sprint -i sprint1 -force
The following activities will terminate the transaction WITHOUT failover but the session itself will re-connect automatically: [If performed on the node where the session is connected]
- OS kill -9 of the session PID.
- Stopping the cluster of the active node: crsctl stop cluster
- Stopping the CRS of the active node: crsctl stop crs
Configure sqlnet.ora parameters as similar to what you have on old 11g environment with adding one extra parameter to allow the application to connect from 11g Oracle Client: [Both nodes]
NAMES.DIRECTORY_PATH= (TNSNAMES, EZCONNECT)
SQLNET.EXPIRE_TIME= 3
SQLNET.ALLOWED_LOGON_VERSION_SERVER=11
Note: starting from 18c SQLNET.ALLOWED_LOGON_VERSION_SERVER is defaulted to 12 which means; in case your applications connects to the DB server via Oracle Client version 11g they will receive the following error:
ORA-28040: No matching authentication protocol
In the above example I'm setting SQLNET.ALLOWED_LOGON_VERSION_SERVER parameter to 11 to allow the applications connecting via Oracle Client version 11 to connect to my 19c DB.
Note: As per oracle MOS (Doc ID 207303.1) the least compatible Oracle Client version to connect to a 19c DB server is 11.2.0.1
Note: sqlnet.ora file must be located under $ORACLE_HOME/network/admin, if you want to create a symbolic link of sqlnet.ora under $GRID_HOME/network/admin this is your business, but always maintain sqlnet.ora under ORACLE HOME.
Setup the Initialization parameters:
Note: sqlnet.ora file must be located under $ORACLE_HOME/network/admin, if you want to create a symbolic link of sqlnet.ora under $GRID_HOME/network/admin this is your business, but always maintain sqlnet.ora under ORACLE HOME.
Setup the Initialization parameters:
Non-Default Initialization Parameters sync between old 11g environment and 19c:
If you have non-default initialization parameters on your old 11g environment try to use the same on 19c (for hidden _* parameters you may need to get Oracle's Support blessing before using the same on 19c).
e.g.
SQL> alter system set "_shared_pool_reserved_pct"=10 SCOPE=SPFILE SID='*';
ALTER SYSTEM SET "_complex_view_merging"=FALSE SCOPE=SPFILE SID='*';
ALTER SYSTEM SET "_disable_fast_validate"=TRUE SCOPE=SPFILE SID='*';
ALTER SYSTEM SET "_disable_interface_checking"=TRUE SCOPE=SPFILE SID='*';
ALTER SYSTEM SET "_enable_NUMA_support"=FALSE SCOPE=SPFILE SID='*';
ALTER SYSTEM SET "_file_size_increase_increment"=2044m SCOPE=SPFILE SID='*';
ALTER SYSTEM SET "_gc_policy_time"=0 SCOPE=SPFILE SID='*';
ALTER SYSTEM SET "_optim_peek_user_binds"=FALSE SCOPE=BOTH SID='*';
ALTER SYSTEM SET "_optimizer_adaptive_cursor_sharing"=FALSE SCOPE=BOTH SID='*';
ALTER SYSTEM SET "_optimizer_extended_cursor_sharing_rel"='NONE' SCOPE=BOTH SID='*';
ALTER SYSTEM SET "_optimizer_extended_cursor_sharing"='NONE' SCOPE=BOTH SID='*';
ALTER SYSTEM SET "_srvntfn_jobsubmit_interval"=5 SCOPE=BOTH SID='*';
ALTER SYSTEM SET "_srvntfn_max_concurrent_jobs"=100 SCOPE=BOTH SID='*';
ALTER SYSTEM SET "_srvntfn_q_msgcount_inc"=5 SCOPE=BOTH SID='*';
ALTER SYSTEM SET "_use_adaptive_log_file_sync"='FALSE' SCOPE=BOTH SID='*';
ALTER SYSTEM SET archive_lag_target=1800 SCOPE=BOTH SID='*';
ALTER SYSTEM SET db_file_multiblock_read_count=16 SCOPE=SPFILE SID='*';
ALTER SYSTEM SET db_flashback_retention_target=360 SCOPE=BOTH SID='*';
ALTER SYSTEM SET filesystemio_options='SETALL' SCOPE=SPFILE SID='*';
ALTER SYSTEM SET global_names=FALSE SCOPE=SPFILE SID='*';
ALTER SYSTEM SET log_archive_trace=0 SCOPE=SPFILE SID='*';
ALTER SYSTEM SET open_cursors=10000 SCOPE=BOTH SID='*';
ALTER SYSTEM SET parallel_max_servers=8 SCOPE=BOTH SID='*';
ALTER SYSTEM SET parallel_servers_target=8 SCOPE=BOTH SID='*';
ALTER SYSTEM SET session_cached_cursors=100 SCOPE=SPFILE SID='*';
ALTER SYSTEM SET aq_tm_processes=0 SCOPE=BOTH SID='*';
ALTER SYSTEM SET job_queue_processes=0 SCOPE=BOTH SID='*';
ALTER SYSTEM SET control_file_record_keep_time=60 SCOPE=SPFILE SID='*';
ALTER SYSTEM SET undo_retention=86400 SCOPE=SPFILE SID='*';
Restart the DB in order for the new parameter to take effect:
$ srvctl stop database -database sprint
$ srvctl start database -database sprint
As you can notice, I'm disabling features like Bind Peeking and Adaptive Cursor Sharing as they have a bad history with my applications.
RMAN configurations:
$ chown oracle:oinstall /cloudfs
$ chmod 775 /cloudfs
$ mkdir -p /cloudfs/backup/sprint
$ rman target /
CONFIGURE BACKUP OPTIMIZATION ON;
CONFIGURE CONTROLFILE AUTOBACKUP ON;
CONFIGURE CONTROLFILE AUTOBACKUP FORMAT FOR DEVICE TYPE DISK TO '/cloudfs/backup/sprint/%F';
CONFIGURE CONTROLFILE AUTOBACKUP FORMAT FOR DEVICE TYPE 'SBT_TAPE' TO '%F';
CONFIGURE ARCHIVELOG DELETION POLICY TO APPLIED ON ALL STANDBY;
CONFIGURE SNAPSHOT CONTROLFILE NAME TO '+SPRINT_RECO/snapcf_sprint.f';
Add TEMPFILES:
SQL> alter tablespace temp add tempfile;
alter tablespace temp add tempfile;
alter tablespace temp add tempfile;
alter tablespace temp add tempfile;
Add UNDO datafiles:
SQL>ALTER TABLESPACE UNDOTBS1 ADD DATAFILE '+SPRINT_DATA' SIZE 1g AUTOEXTEND ON NEXT 1g MAXSIZE 30g;
ALTER TABLESPACE UNDOTBS1 ADD DATAFILE '+SPRINT_DATA' SIZE 1g AUTOEXTEND ON NEXT 1g MAXSIZE 30g;
ALTER TABLESPACE UNDOTBS1 ADD DATAFILE '+SPRINT_DATA' SIZE 1g AUTOEXTEND ON NEXT 1g MAXSIZE 30g;
ALTER TABLESPACE UNDOTBS1 ADD DATAFILE '+SPRINT_DATA' SIZE 1g AUTOEXTEND ON NEXT 1g MAXSIZE 30g;
ALTER TABLESPACE UNDOTBS2 ADD DATAFILE '+SPRINT_DATA' SIZE 1g AUTOEXTEND ON NEXT 1g MAXSIZE 30g;
ALTER TABLESPACE UNDOTBS2 ADD DATAFILE '+SPRINT_DATA' SIZE 1g AUTOEXTEND ON NEXT 1g MAXSIZE 30g;
ALTER TABLESPACE UNDOTBS2 ADD DATAFILE '+SPRINT_DATA' SIZE 1g AUTOEXTEND ON NEXT 1g MAXSIZE 30g;
ALTER TABLESPACE UNDOTBS2 ADD DATAFILE '+SPRINT_DATA' SIZE 1g AUTOEXTEND ON NEXT 1g MAXSIZE 30g;
Interconnect Configuration:
Setup the Private NIC as the cluster_interconnect on all ASM & DB instances on the cluster: [Otherwise Public NIC will be used by default]
SQL> select * from gv$configured_interconnects;
-- On ASM instance:
$ . ~/setasm
$ sqlplus "/ as sysasm"
SQL> alter system set cluster_interconnects='10.110.100.34' scope=spfile sid='+ASM1';
SQL> alter system set cluster_interconnects='10.110.100.35' scope=spfile sid='+ASM2';
-- On DB instance:
sqlplus "/ as sysdba"
SQL> alter system set cluster_interconnects='10.110.100.34' scope=spfile sid='SPRINT1';
SQL> alter system set cluster_interconnects='10.110.100.35' scope=spfile sid='SPRINT2';
$ crsctl stop cluster -all
$ crsctl start cluster -all
Confirm the interconnect is now pointing to the interconnect NIC:
SQL> select * from gv$configured_interconnects;
INST_ID NAME IP_ADDRESS IS_ SOURCE CON_ID
---------- ------------ ---------------- --- ------------------------------- ------
2 eth1 10.110.100.35 NO cluster_interconnects parameter 0
1 eth1 10.110.100.34 NO cluster_interconnects parameter 0
Tablespaces Creation: [Create the tablespace that will hold application data]
SQL> CREATE TABLESPACE P_FZ_DATA DATAFILE '+SPRINT_DATA' SIZE 15g AUTOEXTEND ON NEXT 1g MAXSIZE 30g EXTENT MANAGEMENT LOCAL SEGMENT SPACE MANAGEMENT AUTO;
ALTER TABLESPACE P_FZ_DATA ADD DATAFILE '+SPRINT_DATA' SIZE 15g AUTOEXTEND ON NEXT 1g MAXSIZE 30g;
ALTER TABLESPACE P_FZ_DATA ADD DATAFILE '+SPRINT_DATA' SIZE 15g AUTOEXTEND ON NEXT 1g MAXSIZE 30g;
Create Application User's profiles if found
Create all Application Schemas:
-- Generate the User Creation Script on the old 11g database and execute it on the 19c database:
SQL> select 'CREATE USER '||u.NAME||' IDENTIFIED BY VALUES '''||u.PASSWORD||''' PROFILE '||d.PROFILE||' DEFAULT TABLESPACE '||d.DEFAULT_TABLESPACE||' QUOTA UNLIMITED ON '||d.DEFAULT_TABLESPACE||';' from user$ u, dba_users d where u.name=d.username and u.name not in ('ANONYMOUS','APEX_030200','APEX_PUBLIC_USER','APPQOSSYS','CTXSYS','DBSNMP','EXFSYS','MDDATA','MDSYS','MGMT_VIEW','OLAPSYS','ORACLE_OCM','ORDDATA','ORDPLUGINS','ORDSYS','OUTLN','OWBSYS','OWBSYS_AUDIT','PERFSTAT','SCOTT','SPATIAL_CSW_ADMIN_USR','SPATIAL_WFS_ADMIN_USR','STDBYPERF','SYS','SYSMAN','SYSTEM','WMSYS','XDB','XS$NULL','DBA_BUNDLEEXP7','SI_INFORMTN_SCHEMA') order by 1;
-- Reset the password for each user using the clear text password on the 19c database:
Because 11g hash algorithm differs than 19c hash algorithm, using "IDENTIFIED BY VALUES" by copying the hash password from 11g will not work, you have to reset the password for each user in clear text format:
e.g.
Because 11g hash algorithm differs than 19c hash algorithm, using "IDENTIFIED BY VALUES" by copying the hash password from 11g will not work, you have to reset the password for each user in clear text format:
e.g.
SQL> alter user APP1 identified by "abc123";
Note: If you don't reset the password in 19c using the clear text and you used the same hash vlaue from 11g, the applications will get the following error due to the hashing algorithm difference between 11g and 19c:
ORA-01017: invalid username/password; logon denied
Note: If you don't reset the password in 19c using the clear text and you used the same hash vlaue from 11g, the applications will get the following error due to the hashing algorithm difference between 11g and 19c:
ORA-01017: invalid username/password; logon denied
Grant Sys Privileges:
-- Generate the User Creation Script on the old 11g database and execute it on the 19c database:
SQL> select 'grant '||privilege||' to '||grantee||';' from dba_sys_privs where grantee in (select name from user$ where name not in ('ANONYMOUS','APEX_030200','APEX_PUBLIC_USER','APPQOSSYS','CTXSYS','DBSNMP','EXFSYS','MDDATA','MDSYS','MGMT_VIEW','OLAPSYS','ORACLE_OCM','ORDDATA','ORDPLUGINS','ORDSYS','OUTLN','OWBSYS','OWBSYS_AUDIT','PERFSTAT','SCOTT','SPATIAL_CSW_ADMIN_USR','SPATIAL_WFS_ADMIN_USR','STDBYPERF','SYS','SYSMAN','SYSTEM','WMSYS','XDB','XS$NULL','AQ_ADMINISTRATOR_ROLE','CONNECT','DATAPUMP_EXP_FULL_DATABASE','DBA','EXP_FULL_DATABASE','IMP_FULL_DATABASE','JAVADEBUGPRIV','LOGSTDBY_ADMINISTRATOR','MGMT_USER','OEM_ADVISOR','OEM_MONITOR','OLAP_DBA','OWB$CLIENT','RECOVERY_CATALOG_OWNER','RESOURCE','SCHEDULER_ADMIN','OLAP_USER','DATAPUMP_IMP_FULL_DATABASE')) order by grantee,privilege;
Grant Role Privileges:
-- Generate the User Creation Script on the old 11g database and execute it on the 19c database:
SQL> select 'grant '||granted_role||' to '||grantee||';' from dba_role_privs where grantee in (select name from user$ where name not in ('ANONYMOUS','APEX_030200','APEX_PUBLIC_USER','APPQOSSYS','CTXSYS','DBSNMP','EXFSYS','MDDATA','MDSYS','MGMT_VIEW','OLAPSYS','ORACLE_OCM','ORDDATA','ORDPLUGINS','ORDSYS','OUTLN','OWBSYS','OWBSYS_AUDIT','PERFSTAT','SCOTT','SPATIAL_CSW_ADMIN_USR','SPATIAL_WFS_ADMIN_USR','STDBYPERF','SYS','SYSMAN','SYSTEM','WMSYS','XDB','XS$NULL','AQ_ADMINISTRATOR_ROLE','CONNECT','DATAPUMP_EXP_FULL_DATABASE','DBA','EXP_FULL_DATABASE','IMP_FULL_DATABASE','JAVADEBUGPRIV','LOGSTDBY_ADMINISTRATOR','MGMT_USER','OEM_ADVISOR','OEM_MONITOR','OLAP_DBA','OWB$CLIENT','RECOVERY_CATALOG_OWNER','RESOURCE','SCHEDULER_ADMIN','OLAP_USER','DATAPUMP_IMP_FULL_DATABASE','EXECUTE_CATALOG_ROLE','HS_ADMIN_ROLE','SELECT_CATALOG_ROLE')) order by grantee,granted_role;
Grant Privileges on System schemas:
-- Generate the User Creation Script on the old 11g database and execute it on the 19c database:
SQL> set pages 0
select 'grant '||privilege||' on '|| owner||'.'||table_name||' to '||grantee||';' from dba_tab_privs where grantee in (select name from user$ where name not in ('ANONYMOUS','APEX_030200','APEX_PUBLIC_USER','APPQOSSYS','CTXSYS','DBSNMP','EXFSYS','MDDATA','MDSYS','MGMT_VIEW','OLAPSYS','ORACLE_OCM','ORDDATA','ORDPLUGINS','ORDSYS','OUTLN','OWBSYS','OWBSYS_AUDIT','PERFSTAT','SCOTT','SPATIAL_CSW_ADMIN_USR','SPATIAL_WFS_ADMIN_USR','STDBYPERF','SYS','SYSMAN','SYSTEM','WMSYS','XDB','XS$NULL','AQ_ADMINISTRATOR_ROLE','CONNECT','DATAPUMP_EXP_FULL_DATABASE','DBA','EXP_FULL_DATABASE','IMP_FULL_DATABASE','JAVADEBUGPRIV','LOGSTDBY_ADMINISTRATOR','MGMT_USER','OEM_ADVISOR','OEM_MONITOR','OLAP_DBA','OWB$CLIENT','RECOVERY_CATALOG_OWNER','RESOURCE','SCHEDULER_ADMIN','OLAP_USER','DATAPUMP_IMP_FULL_DATABASE','EXECUTE_CATALOG_ROLE','HS_ADMIN_ROLE','SELECT_CATALOG_ROLE'))
and owner not in (select name from user$ where name not in ('ANONYMOUS','APEX_030200','APEX_PUBLIC_USER','APPQOSSYS','CTXSYS','DBSNMP','EXFSYS','MDDATA','MDSYS','MGMT_VIEW','OLAPSYS','ORACLE_OCM','ORDDATA','ORDPLUGINS','ORDSYS','OUTLN','OWBSYS','OWBSYS_AUDIT','PERFSTAT','SCOTT','SPATIAL_CSW_ADMIN_USR','SPATIAL_WFS_ADMIN_USR','STDBYPERF','SYS','SYSMAN','SYSTEM','WMSYS','XDB','XS$NULL','AQ_ADMINISTRATOR_ROLE','CONNECT','DATAPUMP_EXP_FULL_DATABASE','DBA','EXP_FULL_DATABASE','IMP_FULL_DATABASE','JAVADEBUGPRIV','LOGSTDBY_ADMINISTRATOR','MGMT_USER','OEM_ADVISOR','OEM_MONITOR','OLAP_DBA','OWB$CLIENT','RECOVERY_CATALOG_OWNER','RESOURCE','SCHEDULER_ADMIN','OLAP_USER','DATAPUMP_IMP_FULL_DATABASE','EXECUTE_CATALOG_ROLE','HS_ADMIN_ROLE','SELECT_CATALOG_ROLE')) order by 1;
Create a table holds the application schema names which will be replicated by GoldenGate:
SQL> create table GG_REP_SCHEMAS (OWNER VARCHAR2(30));
SQL> INSERT INTO GG_REP_SCHEMAS select name from user$ where name not in ('ANONYMOUS','APEX_030200','APEX_PUBLIC_USER','APPQOSSYS','CTXSYS','DBSNMP','EXFSYS','MDDATA','MDSYS','MGMT_VIEW','OLAPSYS','ORACLE_OCM','ORDDATA','ORDPLUGINS','ORDSYS','OUTLN','OWBSYS','OWBSYS_AUDIT','PERFSTAT','SCOTT','SPATIAL_CSW_ADMIN_USR','SPATIAL_WFS_ADMIN_USR','STDBYPERF','SYS','SYSMAN','SYSTEM','WMSYS','XDB','XS$NULL','AQ_ADMINISTRATOR_ROLE','CONNECT','DATAPUMP_EXP_FULL_DATABASE','DBA','EXP_FULL_DATABASE','IMP_FULL_DATABASE','JAVADEBUGPRIV','LOGSTDBY_ADMINISTRATOR','MGMT_USER','OEM_ADVISOR','OEM_MONITOR','OLAP_DBA','OWB$CLIENT','RECOVERY_CATALOG_OWNER','RESOURCE','SCHEDULER_ADMIN','OLAP_USER','DATAPUMP_IMP_FULL_DATABASE','EXECUTE_CATALOG_ROLE','HS_ADMIN_ROLE','SELECT_CATALOG_ROLE','ADM_PARALLEL_EXECUTE_TASK','APPLICATION_TRACE_VIEWER','AQ_USER_ROLE','AUDIT_ADMIN','AUDIT_VIEWER','AUDSYS','AUTHENTICATEDUSER','BDSQL_ADMIN','BDSQL_USER','CAPTURE_ADMIN','CDB_DBA','CTXAPP','DATAPATCH_ROLE','DBFS_ROLE','DBJAVASCRIPT','DBMS_MDX_INTERNAL','DBSFWUSER','DIP','DVF','DVSYS','DV_ACCTMGR','DV_ADMIN','DV_AUDIT_CLEANUP','DV_DATAPUMP_NETWORK_LINK','DV_GOLDENGATE_ADMIN','DV_GOLDENGATE_REDO_ACCESS','DV_MONITOR','DV_OWNER','DV_PATCH_ADMIN','DV_POLICY_OWNER','DV_PUBLIC','DV_REALM_OWNER','DV_REALM_RESOURCE','DV_SECANALYST','DV_STREAMS_ADMIN','DV_XSTREAM_ADMIN','EJBCLIENT','EM_EXPRESS_ALL','EM_EXPRESS_BASIC','GATHER_SYSTEM_STATISTICS','GDS_CATALOG_SELECT','GGSYS','GGSYS_ROLE','GLOBAL_AQ_USER_ROLE','GSMADMIN_INTERNAL','GSMADMIN_ROLE','GSMCATUSER','GSMROOTUSER','GSMROOTUSER_ROLE','GSMUSER','GSMUSER_ROLE','GSM_POOLADMIN_ROLE','HS_ADMIN_EXECUTE_ROLE','HS_ADMIN_SELECT_ROLE','JAVAIDPRIV','JAVASYSPRIV','JAVAUSERPRIV','JAVA_ADMIN','JMXSERVER','LBACSYS','LBAC_DBA','OJVMSYS','OLAP_XS_ADMIN','OPTIMIZER_PROCESSING_RATE','ORDADMIN','PDB_DBA','PROVISIONER','PUBLIC','RDFCTX_ADMIN','RECOVERY_CATALOG_OWNER_VPD','RECOVERY_CATALOG_USER','REMOTE_SCHEDULER_AGENT','SODA_APP','SYS$UMF','SYSBACKUP','SYSDG','SYSKM','SYSRAC','SYSUMF_ROLE','WM_ADMIN_ROLE','XDBADMIN','XDB_SET_INVOKER','XDB_WEBSERVICES','XDB_WEBSERVICES_OVER_HTTP','XDB_WEBSERVICES_WITH_PUBLIC','XS_CACHE_ADMIN','XS_CONNECT','XS_NAMESPACE_ADMIN','XS_SESSION_ADMIN','_NEXT_USER') order by name;
SQL> commit;
GoldenGate installation:
Download [GoldenGate 19.1.0.0.1 for Oracle on Linux x86-64]: https://www.oracle.com/middleware/technologies/goldengate-downloads.html
In my setup, I'll be using GoldenGate 12.2.0.1.1 on the source 11g database server.
Prerequisites: [For both Source & Target]
- Ports 7805-7809 between RAC1 nodes (11g) and RAC2 nodes (19c) nodes should be opened between both RACs.
- /cloudfs which will host GoldenGate files (installation & trail files) should have at least 25GB of free space.
- STREAMS_POOL_SIZE should be configured to a proper size 2GB+
SQL> ALTER SYSTEM SET STREAMS_POOL_SIZE=2g scope=both;
- Parameter ENABLE_GOLDENGATE_REPLICATION should be enabled: [On Target]
ENABLE_GOLDENGATE_REPLICATION must be set to enable the required supplemental logging along with enabling the minimal supplemental logging on DB.
SQL> ALTER SYSTEM SET ENABLE_GOLDENGATE_REPLICATION=TRUE scope=both;
- Create a dedicated tablespace GGTBS with 2G space for GoldenGate objects: [Already created]
SQL> create tablespace GGTBS datafile '+SPRINT_DATA' size 2G autoextend on next 100M maxsize 30g;
- Create a new schema “GGOWNER” for GoldenGate objects:
SQL> CREATE USER GGOWNER IDENTIFIED BY "oracle123" DEFAULT TABLESPACE GGTBS TEMPORARY TABLESPACE TEMP PROFILE DEFAULT;
- Grant connect,resource,dba,admin privilege to GGOWNER:
SQL> ALTER USER GGOWNER QUOTA UNLIMITED ON GGTBS;
grant connect,resource,dba to GGOWNER;
grant select any dictionary to GGOWNER;
grant create view to GGOWNER;
grant execute on dbms_lock to GGOWNER;
SQL> EXEC DBMS_GOLDENGATE_AUTH.GRANT_ADMIN_PRIVILEGE (grantee=>'GGOWNER',privilege_type=>'*',grant_select_privileges=>true, do_grants=>TRUE);
The following prerequisites are for the Source DB: [In our case it will be for both Source & Target as the DBs will swap the roles]
It will be applied to Target DB after the import of the initial data load.
- Enable force logging: [GoldeGate pre-requisite]
SQL> ALTER DATABASE FORCE LOGGING;
- Enable minimal supplemental Logging: [GoldeGate pre-requisite]
SQL> ALTER DATABASE ADD SUPPLEMENTAL LOG DATA;
- Make sure the database is in archivelog mode, force logging, and minimal supplemental logging enabled: [GoldeGate pre-requisite]
SQL> SELECT LOG_MODE, SUPPLEMENTAL_LOG_DATA_MIN, FORCE_LOGGING FROM V$DATABASE;
- If gg will be installed for the first time on SOURCE then run the checker script that will identify any unsupported data types: [Doc ID 1296168.1]
GoldenGate installation on Source 11g:
Create goldegate OS user:
$ groupadd goldengate
$ useradd -g goldengate -G oinstall,dba,asmdba,asmadmin goldengate
$ passwd goldengate
- Set unlimited password expiry:
$ chage -M 9999 goldengate
$ su - goldengate
Create the User profile:
$ vi .bash_profile
# .bash_profile
if [ -f ~/.bashrc ]; then
. ~/.bashrc
fi
# User specific environment and startup programs
export ORACLE_HOME=/u01/app/oracle/product/11.2.0/dbhome_1
export LD_LIBRARY_PATH=$LD_LIBRARY_PATH:$ORACLE_HOME/lib
export gghome=/cloudfs/gg/gghome
PATH=$PATH:$HOME/bin:$ORACLE_HOME/bin
export PATH
$ mkdir -p /cloudfs/gg/gghome
$ mkdir -p /cloudfs/gg/ggdata/TO19c/dirtmp
$ chown -R goldengate:goldengate /cloudfs
$ chmod -R 775 /cloudfs
Extract GoldenGate 12.2.0.1.1 binaries:
$ unzip fbo_ggs_Linux_x64_shiphome.zip
$ chown goldengate fbo_ggs_Linux_x64_shiphome/ -R
[From VNC session]
[By goldengate user]
$ cd /u02/goldengate/fbo_ggs_Linux_x64_shiphome/Disk1
$ xhost +
$ export DISPLAY=localhost:1.0
$ ./runInstaller
Installation option:
Select: Oracle GoldenGate for Oracle Database 11g
-> Next
Software location: /cloudfs/gg/gghome
Un-Check "Start Manager"
Database Location: /u01/app/oracle/product/11.2.0/dbhome_1
Manager Port: 7809
-> Next
Save the response file
-> Install
-> Close
>> In case of rollback [deinstall]:
# /cloudfs/gg/deinstall/deinstall.sh
yes
Post GoldenGate installation steps:
Copy oraInst.loc: [Optional]
$ cp /etc/oraInst.loc /goldengate/gghome/oraInst.loc
$ chown goldengate:goldengate /cloudfs/gg/gghome/oraInst.loc
Create Directories:
$ ggsci
GGSCI> create subdirs
Add the following tns entries: [Which refers to both source 11g DB and target 19c DB]
$ vi /u01/app/oracle/product/11.2.0/dbhome_1/network/admin/tnsnames.ora
SPRINT_11g =
(DESCRIPTION =
(ADDRESS = (PROTOCOL = TCP)(HOST = rac1-scan)(PORT = 1521))
(CONNECT_DATA =
(SERVER = DEDICATED)
(SERVICE_NAME = pssfztest_gg)
)
)
SPRINT_19c =
(DESCRIPTION =
(ADDRESS = (PROTOCOL = TCP)(HOST = rac2-scan)(PORT = 1521))
(CONNECT_DATA =
(SERVER = DEDICATED)
(SERVICE_NAME = pssfztest_gg)
)
)
Create Encryption Key file ENCKEYS:
Generate Encrypted GGOWNER DB user password:
In order to use the encrypted version password inside parameter file instead of using a clear text one, generate an encrypted version: [using AES128 encryption algorethm]
$ cd /cloudfs/gg/gghome
$ ./keygen 128 4
0xDCF4DC2C3896EC1B541C3C6F5B05A370
0xA2F23B1CCA3C71109E169827B4DADA1E
0x68F09A0B5CE3F504E710F45F0CB0124D
0x2DEEF97AED897A79310B501864854A7B
Create ENCKEYS file by inserting the above generated keys into it putting securekeyN:
$ vi /goldengate/gghome/ENCKEYS
securekey1 0xDCF4DC2C3896EC1B541C3C6F5B05A370
securekey2 0xA2F23B1CCA3C71109E169827B4DADA1E
securekey3 0x68F09A0B5CE3F504E710F45F0CB0124D
securekey4 0x2DEEF97AED897A79310B501864854A7B
Generate the encrypted password from the console using AES128 algorithm:
$ ggsci
e.g. ENCRYPT PASSWORD <ggowner_DB_user_password> AES128 ENCRYPTKEY securekey1
GGSCI> ENCRYPT PASSWORD oracle123 AES128 ENCRYPTKEY securekey1
Encrypted password: AADAAAAAAAAAAAJAKJTEZEIAJGJGOEIGVGZISABISIZBCEMDAAAAAAAAAAAAAAAAAAAAAAAAAAAAAAAA
Algorithm used: AES128
Test connecting to the DB using this encrypted password:
GGSCI> dblogin userid ggowner@sprint_11g, password AADAAAAAAAAAAAJAKJTEZEIAJGJGOEIGVGZISABISIZBCEMDAAAAAAAAAAAAAAAAAAAAAAAAAAAAAAAA, encryptkey securekey1
Add CHECKPOINT table:
GGSCI> dblogin userid ggowner@SPRINT_11g, password AADAAAAAAAAAAAJAKJTEZEIAJGJGOEIGVGZISABISIZBCEMDAAAAAAAAAAAAAAAAAAAAAAAAAAAAAAAA, encryptkey securekey1
GGSCI> add checkpointtable GGOWNER.CHECKPOINTTAB
Enable DDL replication:
[By goldengate]
$ cd /cloudfs/gg/gghome/
$ export ORACLE_SID=SPRINT
$ sqlplus / as sysdba
[Run the following scripts respectively. When prompt, give GGOWNER as GoldenGate schema]
SQL> @marker_setup.sql
SQL> @ddl_setup.sql
SQL> @role_setup.sql
SQL> GRANT GGS_GGSUSER_ROLE TO GGOWNER;
SQL> @ddl_enable.sql
Create GLOBALS file:
$ vi /cloudfs/gg/gghome/GLOBALS
GGSCHEMA GGOWNER
CHECKPOINTTABLE GGOWNER.CHECKPOINTTAB
Create mgr.prm:
The mgr.prm parameter is the config file of the Manager process which determines which port GoldenGate will use and will include the purge policy of the GoldenGate generated trail files.
The mgr.prm parameter is the config file of the Manager process which determines which port GoldenGate will use and will include the purge policy of the GoldenGate generated trail files.
$ vi /cloudfs/gg/gghome/dirprm/mgr.prm
PORT 7809
LAGINFOHOURS 1
LAGREPORTHOURS 1
-- PURGE TRAIL FILES older than 7 days:
PURGEOLDEXTRACTS /cloudfs/gg/ggdata/TO19c/*, USECHECKPOINTS, MINKEEPHOURS 168
Re-start the Manager process:
$ /cloudfs/gg/gghome/ggsci
GGSCI> stop manager
GGSCI> start manager
Add Trandata for all application schemas:
This will allow GoldenGate to acquire the transaction information it needs from the redo log data.
$ ggsci
GGSCI> dblogin USERID GGOWNER@SPRINT_11g, PASSWORD oracle123
ADD SCHEMATRANDATA APISEC
ADD SCHEMATRANDATA CTRLINV
ADD SCHEMATRANDATA PROS_USER
ADD SCHEMATRANDATA P_FZ
ADD SCHEMATRANDATA P_FZ_ADM
ADD SCHEMATRANDATA P_FZ_ADMIN
ADD SCHEMATRANDATA P_FZ_APISEC
ADD SCHEMATRANDATA P_FZ_APP
ADD SCHEMATRANDATA P_FZ_ARCH
ADD SCHEMATRANDATA P_FZ_CRYPT
ADD SCHEMATRANDATA P_FZ_DA
ADD SCHEMATRANDATA P_FZ_FQ
ADD SCHEMATRANDATA P_FZ_RPT
ADD SCHEMATRANDATA P_FZ_SEC
ADD SCHEMATRANDATA P_FZ_UDW
ADD SCHEMATRANDATA RAFZPRDSEC_APP
ADD SCHEMATRANDATA RAFZPRD_APP
ADD SCHEMATRANDATA RAFZPRD_PFS
ADD SCHEMATRANDATA RAFZPRD_RO
ADD SCHEMATRANDATA RA_SUP
ADD SCHEMATRANDATA SPRINT_BKP
ADD SCHEMATRANDATA SPRINT_CONFIG
ADD SCHEMATRANDATA SPRINT_CONFIG_APP
ADD SCHEMATRANDATA SPRINT_IROPS
ADD SCHEMATRANDATA SPRINT_IROPS_APP
ADD SCHEMATRANDATA SPRINT_NPREFRESH
ADD SCHEMATRANDATA SPRINT_PRICING_CONFIG
ADD SCHEMATRANDATA SPRINT_PRICING_CONFIG_APP
ADD SCHEMATRANDATA SPRINT_SCHED
ADD SCHEMATRANDATA SPRINT_SCHED_APP
Create Extract parameter file /cloudfs/gg/gghome/dirprm/EXTTO19C.prm: [Source 11g DB server]
The Extract parameter file is the config file of the Extract process which will mine for the transactions inside REDO LOG files and extract them into native GoldenGate trail files.
$ vi /cloudfs/gg/gghome/dirprm/EXTTO19C.prm
EXTRACT EXTTO19C
SETENV (ORACLE_HOME="/u01/app/oracle/product/11.2.0/dbhome_1")
SETENV (NLS_DATE_FORMAT="YYYY-MM-DD:HH24:MI:SS")
SETENV (GG_HOME="/cloudfs/gg/gghome")
USERID GGOWNER@SPRINT_11g, PASSWORD AADAAAAAAAAAAAJAKJTEZEIAJGJGOEIGVGZISABISIZBCEMDAAAAAAAAAAAAAAAAAAAAAAAAAAAAAAAA, encryptkey securekey1
TRANLOGOPTIONS DBLOGREADER
TRANLOGOPTIONS INCLUDEREGIONID
FETCHOPTIONS NOUSESNAPSHOT
STATOPTIONS REPORTFETCH
WARNLONGTRANS 5H, CHECKINTERVAL 30M
REPORTCOUNT EVERY 5 MINUTES, RATE
WILDCARDRESOLVE DYNAMIC
DISCARDFILE ?GG_HOME/dirrpt/EXTTO19C.dsc, APPEND, MEGABYTES 500
DISCARDROLLOVER AT 01:00 ON SUNDAY
DDL INCLUDE MAPPED
EXTTRAIL /cloudfs/gg/ggdata/TO19c/11
Table APISEC.*;
Table CTRLINV.*;
Table PROS_USER.*;
Table P_FZ.*;
Table P_FZ_ADM.*;
Table P_FZ_ADMIN.*;
Table P_FZ_APISEC.*;
Table P_FZ_APP.*;
Table P_FZ_ARCH.*;
Table P_FZ_CRYPT.*;
Table P_FZ_DA.*;
Table P_FZ_FQ.*;
Table P_FZ_RPT.*;
Table P_FZ_SEC.*;
Table P_FZ_UDW.*;
Table RAFZPRDSEC_APP.*;
Table RAFZPRD_APP.*;
Table RAFZPRD_PFS.*;
Table RAFZPRD_RO.*;
Table RA_SUP.*;
Table SPRINT_BKP.*;
Table SPRINT_CONFIG.*;
Table SPRINT_CONFIG_APP.*;
Table SPRINT_IROPS.*;
Table SPRINT_IROPS_APP.*;
Table SPRINT_NPREFRESH.*;
Table SPRINT_PRICING_CONFIG.*;
Table SPRINT_PRICING_CONFIG_APP.*;
Table SPRINT_SCHED.*;
Table SPRINT_SCHED_APP.*;
Create PUMP parameter file /cloudfs/gg/gghome/dirprm/PMPTO19C.prm: [Source 11g RAC1-N1]
You remember the Extract process we created earlier to extract the transactions from the REDO LOG file and write them into native GoldenGate trail files? Now, this PUMP parameter file is the config file for the PUMP process which we will create next to transfer the generated Extract trail files to the target machine.
$ vi /cloudfs/gg/gghome/dirprm/PMPTO19C.prm
EXTRACT PMPTO19C
SETENV (TGT_GGPATH="/cloudfs/gg/gghome")
PASSTHRU
RMTHOST 10.100.23.44 MGRPORT 7809
RMTTRAIL /cloudfs/gg/ggdata_from11g/11
Table APISEC.*;
Table CTRLINV.*;
Table PROS_USER.*;
Table P_FZ.*;
Table P_FZ_ADM.*;
Table P_FZ_ADMIN.*;
Table P_FZ_APISEC.*;
Table P_FZ_APP.*;
Table P_FZ_ARCH.*;
Table P_FZ_CRYPT.*;
Table P_FZ_DA.*;
Table P_FZ_FQ.*;
Table P_FZ_RPT.*;
Table P_FZ_SEC.*;
Table P_FZ_UDW.*;
Table RAFZPRDSEC_APP.*;
Table RAFZPRD_APP.*;
Table RAFZPRD_PFS.*;
Table RAFZPRD_RO.*;
Table RA_SUP.*;
Table SPRINT_BKP.*;
Table SPRINT_CONFIG.*;
Table SPRINT_CONFIG_APP.*;
Table SPRINT_IROPS.*;
Table SPRINT_IROPS_APP.*;
Table SPRINT_NPREFRESH.*;
Table SPRINT_PRICING_CONFIG.*;
Table SPRINT_PRICING_CONFIG_APP.*;
Table SPRINT_SCHED.*;
Table SPRINT_SCHED_APP.*;
Create EXTRACT & PUMP groups from GoldenGate console ggsci: [On Source 11g DB server]
-- Create new directories for gg trail files to 19c DB:
-- As goldengate user
$ mkdir -p /cloudfs/gg/ggdata/TO19c
-- Add new Extract EXTTO19C to extract the data from SPRINTP:
GGSCI> dblogin userid ggowner@SPRINT_11g, password AADAAAAAAAAAAAJAKJTEZEIAJGJGOEIGVGZISABISIZBCEMDAAAAAAAAAAAAAAAAAAAAAAAAAAAAAAAA, encryptkey securekey1
GGSCI> ADD EXTRACT EXTTO19C, THREADS 2,TRANLOG, BEGIN NOW
GGSCI> ADD EXTTRAIL /cloudfs/gg/ggdata/TO19c/11 , EXTRACT EXTTO19C, MEGABYTES 100
GGSCI> ALTER EXTRACT EXTTO19C, BEGIN NOW
GGSCI> ADD EXTRACT PMPTO19C, EXTTRAILSOURCE /cloudfs/gg/ggdata/TO19c/11
GGSCI> ADD RMTTRAIL /cloudfs/gg/ggdata_from11g/11, EXTRACT PMPTO19C, MEGABYTES 100
GGSCI> ALTER EXTRACT PMPTO19C, BEGIN NOW
Note: Pump process will not start unless GoldenGate gets installed on the target 19c DB server, and this step will come later.
GGSCI> start manager
Start the new Extract process on 11g DB server:
GGSCI> start manager
GGSCI> Alter EXTRACT EXTTO19C begin now
GGSCI> start EXTTO19C
Export Application Schemas from 11g database and Import them on 19c database:
Export the Application schemas on source 11g DB:
SQL> CREATE USER DBA_BUNDLEEXP7 IDENTIFIED BY "oracle123";
SQL> GRANT DBA TO DBA_BUNDLEEXP7;
SQL> Create or replace directory EXPORT_FILES_DBA_BUNDLE as '/nfs-bkp/export_for19c';
-- Check the current_scn to be used during the export:
SQL> col current_scn for 999999999999999
select current_scn from v$database;
6323564105224
-- Create export PAR file:
$ vi /nfs-bkp/export_for19c/export_sprintp.par
directory=EXPORT_FILES_DBA_BUNDLE
dumpfile=sprintp%u.dmp
logfile=exp_sprintp.log
parallel=6
filesize=50g
COMPRESSION=NONE
REUSE_DUMPFILES=TRUE
CLUSTER=N
schemas=APISEC,ASPNETFZ,AVS_TEMP,CSMIG,CTRLINV,DG_MONITOR,EMCBKP,EXT_PRICING_RO,FOG_MON,FZOPER,MONOFFICER,PROS_USER,P_FZ,P_FZ_ADM,P_FZ_ADMIN,P_FZ_APISEC,P_FZ_APP,P_FZ_ARCH,P_FZ_CRYPT,P_FZ_DA,P_FZ_FQ,P_FZ_RPT,P_FZ_SEC,P_FZ_UDW,RAFZPRDSEC_APP,RAFZPRD_APP,RAFZPRD_PFS,RAFZPRD_RO,RA_SUP,SANTOSH_APPTEMP,SVC_ORAAPPMON,SVC_ORAMON,WOAPIFZ,SPRINT_BKP,SPRINT_CONFIG,SPRINT_CONFIG_APP,SPRINT_IROPS,SPRINT_IROPS_APP,SPRINT_NPREFRESH,SPRINT_PRICING_CONFIG,SPRINT_PRICING_CONFIG_APP,SPRINT_SCHED,SPRINT_SCHED_APP
flashback_scn=6323564105224
$ export ORACLE_SID=psstest1
$ nohup expdp DBA_BUNDLEEXP7/oracle123 PARFILE=/nfs-bkp/export_for19c/export_sprintp.par 2>&1 &
Import the Application Schemas on the 19c DB:
$ vi /nfs-bkp/export_for19c/import_SPRINTP_FULL.par
directory=EXPORT_FILES_DBA_BUNDLE
dumpfile=sprintp%u.dmp
logfile=imp_SPRINT_FULL.log
parallel=6
cluster=N
CONTENT=ALL
TABLE_EXISTS_ACTION=SKIP
EXCLUDE=SCHEMA:"IN ('OUTLN','SYSTEM','SYSMAN','FLOWS_FILES','APEX_030200','APEX_PUBLIC_USER','ANONYMOUS','GGOWNER')"
# Disable logging during the import: A 19c powerful feature
TRANSFORM=DISABLE_ARCHIVE_LOGGING:Y
logtime=all
$ export ORACLE_SID=sprint1
$ nohup impdp DBA_BUNDLEEXP7/oracle123 PARFILE=/nfs-bkp/export_for19c/import_SPRINTP_FULL.par 2>&1 &
Grant object privileges in case they were missed during the import:
[Generate the script on the 11g database]
SQL> set pages 0
SQL> spool obj_priv.sql
SQL> select 'grant '||privilege||' on '||owner||'.'||table_name||' to '||grantee||';' from dba_tab_privs where grantee in (select owner from GG_REP_SCHEMAS);
SQL> spool off
[Execute the script on the 19c database]
SQL> set pages 0
SQL> spool obj_priv.log
SQL> @obj_priv.sql
SQL> spool off
Create the Public Synonyms on the 19c database:
[Generate the script on the 11g database]
SQL> set pages 0 echo off feedback off
SQL> spool public_synonyms.sql
SQL> select 'create public synonym '||SYNONYM_NAME||' for '||TABLE_OWNER||'.'||TABLE_NAME||' ;' from dba_synonyms where OWNER='PUBLIC' and TABLE_OWNER in (select owner from GG_REP_SCHEMAS);
SQL> spool off
[Execute the script on the 19c database]
SQL> set pages 0
SQL> spool public_synonyms.log
SQL> @public_synonyms.sql
SQL> spool off
...
Create the Database Links on the 19c database as similar to the ones exist on the 11g DB:
SQL> CREATE DATABASE LINK DBX1 CONNECT TO X1 IDENTIFIED BY oracle123 USING 'DBX1';
...
Create the Network ACLs: [Missed by the import process]
Generate the ACLs using this script on Source 11g DB and execute the output script on Target 19c:
https://oracle-base.com/dba/script?category=script_creation&file=network_acls_ddl.sql
Disable the Triggers on the 19c DB: [As all tables will be replicated by GoldenGate we don't want the
[Generate the script on the 11g database]
SQL> set pages 0
SQL> spool disable_triggers.sql
SQL> select 'alter trigger '||owner||'.'||trigger_name||' disable;' from dba_triggers where status='ENABLED' and owner in (select owner from GG_REP_SCHEMAS);
SQL> spool off
[Execute the script on the 19c database]
SQL> set pages 0
SQL> spool disable_triggers.log
SQL> @disable_triggers.sql
SQL> spool off
Compile the Invalid Objects on the 19c DB
SQL> @?/rdbms/admin/utlrp
SQL> set pages 1000 lines 200
SQL> col OBJECT_NAME for a45
SQL> col owner for a12
SQL> select owner,OBJECT_TYPE,OBJECT_NAME,CREATED,LAST_DDL_TIME,TIMESTAMP,STATUS from dba_objects where status='INVALID' order by 1,2,3;
Make sure the number of invalid objects for Application schemas is the same between 11g DB and 19c DB otherwise you will need to work in compiling those objects.
Gather Statistics on the 19c DB:
--DB Statistics: [May take hours]
SQL> EXECUTE DBMS_STATS.GATHER_DATABASE_STATS(ESTIMATE_PERCENT=>100, CASCADE => TRUE, GATHER_SYS => TRUE, degree => 12);
-- Dictionary Statistics: [May take few minutes]
SQL> EXECUTE DBMS_STATS.GATHER_DICTIONARY_STATS;
Note: Fixed object & System Statistics [CPU/IO] will be gathered after the 19c system go live and have a representative workload.
Enable ARCHIVELOG & FORCE LOGGING modes: [on the 19c database]
$ srvctl stop database -d sprint
SQL> startup mount
SQL> ALTER DATABASE ARCHIVELOG;
SQL> alter database open;
SQL> ALTER DATABASE FORCE LOGGING;
$ srvctl start database -d sprint
Install 19c Goldengate on the 19c server:
Create goldengate OS user:
$ groupadd goldengate
$ useradd -g goldengate -G oinstall,dba,asmdba,asmadmin goldengate
$ passwd goldengate
- Set unlimited password expiry:
$ chage -M 9999 goldengate
$ su - goldengate
Create the User profile:
$ vi .bash_profile
# .bash_profile
# Get the aliases and functions
if [ -f ~/.bashrc ]; then
. ~/.bashrc
fi
# User specific environment and startup programs
export ORACLE_HOME=/u01/oracle/12.2.0.3
export LD_LIBRARY_PATH=$LD_LIBRARY_PATH:$ORACLE_HOME/lib
export gghome=/cloudfs/gg/gghome
PATH=$PATH:$HOME/bin:$ORACLE_HOME/bin
export PATH
Create goldengate installation directories tree:
$ mkdir -p /cloudfs/gg/gghome/
$ mkdir -p /cloudfs/gg/ggdata/dirtmp
$ chown -R goldengate:goldengate /cloudfs/gg
$ chmod -R 775 /cloudfs/gg
Extract GoldenGate 19.1.0.0.1 binaries: [under any temp directory]
$ unzip 191001_fbo_ggs_Linux_x64_shiphome.zip
$ chown goldengate fbo_ggs_Linux_x64_shiphome/ -R
[From VNC session]
[By goldengate user]
$ cd /u02/fbo_ggs_Linux_x64_shiphome/Disk1
$ xhost +
$ export DISPLAY=localhost:1.0
$ ./runInstaller
Installation option:
Select: Oracle GoldenGate for Oracle Database 19c
-> Next
Software location: /cloudfs/gg/gghome
Check "Start Manager"
Database Location: /u01/oracle/12.2.0.3
Manager Port: 7809
-> Click Yes to confirm installing GoldenGate on a non shared filesystem
-> Next
Save the response file
-> Install
-> Close
>> In case of rollback [deinstall]: [Due to any reason]
# /cloudfs/gg/gghome/deinstall/deinstall.sh
yes
Configuring GoldenGate:
Copy oraInst.loc: [optional]
$ cp /etc/oraInst.loc /cloudfs/gg/gghome/oraInst.loc
$ chown goldengate:goldengate /cloudfs/gg/gghome/oraInst.loc
Create gg Directory tree:
$ ggsci
GGSCI> create subdirs
Add the following tns entries:
$ vi /u01/oracle/12.2.0.3/network/admin/tnsnames.ora
SPRINT_11g =
(DESCRIPTION =
(ADDRESS = (PROTOCOL = TCP)(HOST = rac1-scan)(PORT = 1521))
(CONNECT_DATA =
(SERVER = DEDICATED)
(SERVICE_NAME = pssfztest_gg)
)
)
SPRINT_19c =
(DESCRIPTION =
(ADDRESS = (PROTOCOL = TCP)(HOST = rac2-scan)(PORT = 1521))
(CONNECT_DATA =
(SERVER = DEDICATED)
(SERVICE_NAME = pssfztest_gg)
)
)
Copy the ENCKEYS file from Source 11g DB server to the Target 19c DB server [ENCKEYS must be the same between source and target]
[From Source 11g DB server]
$ scp /cloudfs/gg/gghome/ENCKEYS goldengate@rac2-n1:/cloudfs/gg/gghome/ENCKEYS
Generate the encrypted password from the console:
$ ggsci
e.g. ENCRYPT PASSWORD <ggowner_DB_user_password> AES128 ENCRYPTKEY securekey1
GGSCI> ENCRYPT PASSWORD oracle123 AES128 ENCRYPTKEY securekey1
Encrypted password: AADAAAAAAAAAAAJAKJTEZEIAJGJGOEIGVGZISABISIZBCEMDAAAAAAAAAAAAAAAAAAAAAAAAAAAAAAAA
Algorithm used: AES128
Test connecting to the DB using this encrypted password:
GGSCI> dblogin userid ggowner@SPRINT_19c, password AADAAAAAAAAAAAJAKJTEZEIAJGJGOEIGVGZISABISIZBCEMDAAAAAAAAAAAAAAAAAAAAAAAAAAAAAAAA, encryptkey securekey1
Add CHEKCPOINT table: [On Target 19c RAC2]
GGSCI> dblogin userid ggowner@SPRINT_19c, password AADAAAAAAAAAAAJAKJTEZEIAJGJGOEIGVGZISABISIZBCEMDAAAAAAAAAAAAAAAAAAAAAAAAAAAAAAAA, encryptkey securekey1
GGSCI> add checkpointtable GGOWNER.CHECKPOINTTAB
GoldenGate Mandatory pre-requisites on 19c DB:
- Enable force logging: [GoldenGate pre-requisite]
SQL> ALTER DATABASE FORCE LOGGING;
- Enable minimal supplemental Logging: [GoldenGate pre-requisite]
SQL> ALTER DATABASE ADD SUPPLEMENTAL LOG DATA;
- Make sure database is in archivelog mode, force logging and minimal supplemental logging enabled: [GoldeGate pre-requisite]
SQL> SELECT LOG_MODE, SUPPLEMENTAL_LOG_DATA_MIN, FORCE_LOGGING FROM V$DATABASE;
Create GLOBALS file: [To guide incoming remote trail files where to be copied on the target]
$ mkdir -p /cloudfs/gg/ggdata_from11g
$ vi /cloudfs/gg/gghome/GLOBALS
GGSCHEMA GGOWNER
CHECKPOINTTABLE GGOWNER.CHECKPOINTTAB
ALLOWOUTPUTDIR /cloudfs/gg/ggdata_from11g
Note: The Manager process should be restarted after modifying the GLOBALS parameter file:
GGSCI> stop manager
GGSCI> start manager
Add Trandata for all schemas: [Target 19c Database]
[Already add above]
$ ggsci
GGSCI> dblogin USERID GGOWNER@SPRINT_19c, PASSWORD oracle123
ADD SCHEMATRANDATA APISEC
ADD SCHEMATRANDATA CTRLINV
ADD SCHEMATRANDATA PROS_USER
ADD SCHEMATRANDATA P_FZ
ADD SCHEMATRANDATA P_FZ_ADM
ADD SCHEMATRANDATA P_FZ_ADMIN
ADD SCHEMATRANDATA P_FZ_APISEC
ADD SCHEMATRANDATA P_FZ_APP
ADD SCHEMATRANDATA P_FZ_ARCH
ADD SCHEMATRANDATA P_FZ_CRYPT
ADD SCHEMATRANDATA P_FZ_DA
ADD SCHEMATRANDATA P_FZ_FQ
ADD SCHEMATRANDATA P_FZ_RPT
ADD SCHEMATRANDATA P_FZ_SEC
ADD SCHEMATRANDATA P_FZ_UDW
ADD SCHEMATRANDATA RAFZPRDSEC_APP
ADD SCHEMATRANDATA RAFZPRD_APP
ADD SCHEMATRANDATA RAFZPRD_PFS
ADD SCHEMATRANDATA RAFZPRD_RO
ADD SCHEMATRANDATA RA_SUP
ADD SCHEMATRANDATA SPRINT_BKP
ADD SCHEMATRANDATA SPRINT_CONFIG
ADD SCHEMATRANDATA SPRINT_CONFIG_APP
ADD SCHEMATRANDATA SPRINT_IROPS
ADD SCHEMATRANDATA SPRINT_IROPS_APP
ADD SCHEMATRANDATA SPRINT_NPREFRESH
ADD SCHEMATRANDATA SPRINT_PRICING_CONFIG
ADD SCHEMATRANDATA SPRINT_PRICING_CONFIG_APP
ADD SCHEMATRANDATA SPRINT_SCHED
ADD SCHEMATRANDATA SPRINT_SCHED_APP
Create & Start REPLICAT process to apply the incoming trail files from the 11g DB server: [On Target 19c server]
Replicat process will apply the received GoldenGate trail files from the source server into the target DB. This why the Replicat process can be only found on the target side.
Replicat process will apply the received GoldenGate trail files from the source server into the target DB. This why the Replicat process can be only found on the target side.
$ mkdir -p /cloudfs/gg/ggdata_from11g/dirtmp
$ mkdir -p /cloudfs/gg/ggdata/dirtmp
$ vi /cloudfs/gg/gghome/dirprm/REP11G.prm
REPLICAT REP11G
SETENV (ORACLE_HOME="/u01/oracle/12.2.0.3")
SETENV (NLS_DATE_FORMAT="YYYY-MM-DD:HH24:MI:SS")
SETENV (GG_HOME="/cloudfs/gg/gghome")
USERID GGOWNER@SPRINT_19c, PASSWORD AADAAAAAAAAAAAJAKJTEZEIAJGJGOEIGVGZISABISIZBCEMDAAAAAAAAAAAAAAAAAAAAAAAAAAAAAAAA, encryptkey securekey1
ASSUMETARGETDEFS
DBOPTIONS DEFERREFCONST
--DBOPTIONS SUPPRESSTRIGGERS
DISCARDROLLOVER AT 01:00 ON Sunday
--WILDCARDRESOLVE DYNAMIC
--STATOPTIONS REPORTFETCH
REPORTCOUNT EVERY 5 MINUTES, RATE
DISCARDFILE ?GG_HOME/dirrpt/REP11G.dsc, APPEND, MEGABYTES 100
BATCHSQL
ALLOWNOOPUPDATES
--REPERROR (1403, DISCARD)
--REPERROR (-1, DISCARD)
--ddlerror 904 ignore
MAP APISEC.*, TARGET APISEC.*, COLMAP(USEDEFAULTS);
MAP CTRLINV.*, TARGET CTRLINV.*, COLMAP(USEDEFAULTS);
MAP PROS_USER.*, TARGET PROS_USER.*, COLMAP(USEDEFAULTS);
MAP P_FZ.*, TARGET P_FZ.*, COLMAP(USEDEFAULTS);
MAP P_FZ_ADM.*, TARGET P_FZ_ADM.*, COLMAP(USEDEFAULTS);
MAP P_FZ_ADMIN.*, TARGET P_FZ_ADMIN.*, COLMAP(USEDEFAULTS);
MAP P_FZ_APISEC.*, TARGET P_FZ_APISEC.*, COLMAP(USEDEFAULTS);
MAP P_FZ_APP.*, TARGET P_FZ_APP.*, COLMAP(USEDEFAULTS);
MAP P_FZ_ARCH.*, TARGET P_FZ_ARCH.*, COLMAP(USEDEFAULTS);
MAP P_FZ_CRYPT.*, TARGET P_FZ_CRYPT.*, COLMAP(USEDEFAULTS);
MAP P_FZ_DA.*, TARGET P_FZ_DA.*, COLMAP(USEDEFAULTS);
MAP P_FZ_FQ.*, TARGET P_FZ_FQ.*, COLMAP(USEDEFAULTS);
MAP P_FZ_RPT.*, TARGET P_FZ_RPT.*, COLMAP(USEDEFAULTS);
MAP P_FZ_SEC.*, TARGET P_FZ_SEC.*, COLMAP(USEDEFAULTS);
MAP P_FZ_UDW.*, TARGET P_FZ_UDW.*, COLMAP(USEDEFAULTS);
MAP RAFZPRDSEC_APP.*, TARGET RAFZPRDSEC_APP.*,COLMAP(USEDEFAULTS);
MAP RAFZPRD_APP.*, TARGET RAFZPRD_APP.*, COLMAP(USEDEFAULTS);
MAP RAFZPRD_PFS.*, TARGET RAFZPRD_PFS.*, COLMAP(USEDEFAULTS);
MAP RAFZPRD_RO.*, TARGET RAFZPRD_RO.*, COLMAP(USEDEFAULTS);
MAP RA_SUP.*, TARGET RA_SUP.*, COLMAP(USEDEFAULTS);
MAP SPRINT_BKP.*, TARGET SPRINT_BKP.*, COLMAP(USEDEFAULTS);
MAP SPRINT_CONFIG.*, TARGET SPRINT_CONFIG.*, COLMAP(USEDEFAULTS);
MAP SPRINT_CONFIG_APP.*, TARGET PRINT_CONFIG_APP.*,COLMAP(USEDEFAULTS);
MAP SPRINT_IROPS.*, TARGET SPRINT_IROPS.*,COLMAP(USEDEFAULTS);
MAP SPRINT_IROPS_APP.*, TARGET SPRINT_IROPS_APP.*,COLMAP(USEDEFAULTS);
MAP SPRINT_NPREFRESH.*, TARGET SPRINT_NPREFRESH.*,COLMAP(USEDEFAULTS);
MAP SPRINT_PRICING_CONFIG.*, TARGET SPRINT_PRICING_CONFIG.*,COLMAP(USEDEFAULTS);
MAP SPRINT_PRICING_CONFIG_APP.*, TARGET SPRINT_PRICING_CONFIG_APP.*,COLMAP(USEDEFAULTS);
MAP SPRINT_SCHED.*, TARGET SPRINT_SCHED.*,COLMAP(USEDEFAULTS);
MAP SPRINT_SCHED_APP.*, TARGET SPRINT_SCHED_APP.*,COLMAP(USEDEFAULTS);
GGSCI> dblogin USERID GGOWNER@SPRINT_19c, PASSWORD AADAAAAAAAAAAAJAKJTEZEIAJGJGOEIGVGZISABISIZBCEMDAAAAAAAAAAAAAAAAAAAAAAAAAAAAAAAA, encryptkey securekey1
GGSCI> ADD REPLICAT REP11G, EXTTRAIL /cloudfs/gg/ggdata_from11g/11
-- Start the replication exactly after the SCN of the export operation that happened on source 11g DB:
GGSCI> START REPLICAT REP11G, AFTERCSN 6323564105224
Start the PUMP process on the source 11g DB server: [To start sending the trail files to the 19c server]
Note: GoldenGate manager should be up and running on the target 19c in order to open the port for the PUMP process on source 11g DB to send the trail files.
[By goldengate] on the source 11g DB server:
GGSCI> start PMPTO19C
Now the job is almost done, just a few more steps to consider before Switching over to the 19c DB:
Execution Plans Stability in 19c:
In order to maintain the stability of the current performance of your applications on 11g DB you have to copy the execution plans of all statements to the new 19c DB, so you will guarantee the execution plans will not get changed to bad plans on the new 19c DB. There are two methods to do this
Method A: Use SQL Plan Baseline: [Recommended | No Extra License required, it comes with EE]
Activate SQL Plan Baseline capture on the source 11g DB and Copy it to the target 19c DB:
Enable the plan baseline capture to capture the 11g plans for repeated SQLs: [On the Source 11g DB]
SQL> alter system set OPTIMIZER_CAPTURE_SQL_PLAN_BASELINES=TRUE;
SPM aware optimizer should be enabled to use SQL Plan BASELINES: [Enabled by Default]
SQL> alter system set OPTIMIZER_USE_SQL_PLAN_BASELINES = TRUE;
Leave the plan capture enabled let's say for at least 4 weeks, to make sure most of your applications SQL plans are captured [The more you keep it enabled the more plans will get captured which is good]
Evolve ALL SQL statements inside the Baseline in order to re-evaluate/consider better existing new plans if their cost is LOWER: [Optional]
SQL> SET LONG 10000
SELECT DBMS_SPM.evolve_sql_plan_baseline() FROM dual;
Notes:
- The baseline will capture only statements that been executed at least twice.
- The optimizer_capture_sql_plan_baselines should be kept set to TRUE until you feel all application workload statements have run twice or Hard parsed.
- Statements with outlines will not be considered in the Baseline if the use_stored_outlines parameter is set to TRUE.
A) Create a Staging table: [Source DB]
SQL> BEGIN
DBMS_SPM.CREATE_STGTAB_BASELINE(
table_name => 'SPM_STAGING_TAB',
table_owner => 'P_FZ',
tablespace_name => 'USERS');
END;
/
B) Populate the staging table with the SQL plan Baselines: [Source 11g DB]
SQL> SET SERVEROUTPUT ON
DECLARE
l_plans_packed PLS_INTEGER;
BEGIN
l_plans_packed := DBMS_SPM.pack_stgtab_baseline(
table_name => 'SPM_STAGING_TAB',
table_owner => 'P_FZ');
DBMS_OUTPUT.put_line('Plans Packed: ' || l_plans_packed);
END;
/
C) Export the Staging table on the source 11g DB:
$ expdp \' / as sysdba \' tables=P_FZ.SPM_STAGING_TAB directory=EXPORT_FILES_DBA_BUNDLE dumpfile=SPM_STAGING_TAB.dmp logfile=SPM_STAGING_TAB.log REUSE_DUMPFILES=Y
D) Import the Staging table on the Target 19c DB:
$ impdp \'/ as sysdba\' tables=P_FZ.SPM_STAGING_TAB directory=EXPORT_FILES_DBA_BUNDLE dumpfile=SPM_STAGING_TAB.dmp logfile=IMP_SPM_STAGING_TAB.log
E) Load SQL Plan Baselines into the Dictionary: [On the Target 19c DB]
SQL> SET SERVEROUTPUT ON
DECLARE
l_plans_unpacked PLS_INTEGER;
BEGIN
l_plans_unpacked := DBMS_SPM.unpack_stgtab_baseline(
table_name => 'SPM_STAGING_TAB',
table_owner => 'P_FZ',
creator => 'P_FZ');
DBMS_OUTPUT.put_line('Plans Unpacked: ' || l_plans_unpacked);
END;
/
Now the plans are loaded to the target DB and the 19c optimizer will be aware of them but still, the optimizer can ignore those plans in case it finds better plans.
In case you want to force the optimizer to use those plans from the baseline regardless, they are good or bad, you can fix them using this command: [On the Target 19c DB]
SQL> begin
for i in (select rownum n,plan_name from dba_sql_plan_baselines where accepted='YES') loop
dbms_output.put_line(dbms_spm.alter_sql_plan_baseline(plan_name=>i.plan_name,attribute_name=>'FIXED',attribute_value=>'YES'));
end loop;
end;
/
for i in (select rownum n,plan_name from dba_sql_plan_baselines where accepted='YES') loop
dbms_output.put_line(dbms_spm.alter_sql_plan_baseline(plan_name=>i.plan_name,attribute_name=>'FIXED',attribute_value=>'YES'));
end loop;
end;
/
SQL> select SQL_HANDLE,ENABLED,ACCEPTED,FIXED from DBA_SQL_PLAN_BASELINES;
Or simply: Switch OPTIMIZER_CAPTURE_SQL_PLAN_BASELINES to FALSE and it won't add more plans to the Baseline and will use whatever exists inside the Baselines: [On the Target 19c DB]
SQL> alter system set OPTIMIZER_CAPTURE_SQL_PLAN_BASELINES=FALSE;
Method B: [Downgrade OPTIMIZER_FEATURES_ENABLE for some time]
If the SQL Plan Baseline is not enabled/exist on the source 11g DB and you are in a hurry with your DB upgrade, where you cannot enable plan capture on the source DB for a long time, then revert to the old optimizer for some time:
Set the optimizer version on the 19c DB to the same version of the source DB: [On the Target 19c DB]
SQL> alter system set OPTIMIZER_FEATURES_ENABLE='11.2.0.3';
Enable the plan baseline capture to capture the 11g plans for repeated SQLs: [Leave it for 1 month at least]
SQL> alter system set OPTIMIZER_CAPTURE_SQL_PLAN_BASELINES=TRUE;
Fix the 11g plans by disabling the plan baseline capture to avoid having the execution plans changed:
SQL> alter system set OPTIMIZER_CAPTURE_SQL_PLAN_BASELINES=FALSE;
Set the optimizer version back to 19c:
SQL> alter system set OPTIMIZER_FEATURES_ENABLE='19.1.0';
Backup GRID/ORACLE/GOLDENGATE HOMES:
[By root]
$ cd /u01
$ tar cvfz grid.tar grid; tar cvfz oracle.tar oracle
$ cd /cloudfs/gg
$ tar cvfz gghome.tar gghome
$ cp -p /etc/oracle/ocr.loc /etc/oracle/ocr.loc.sav
$ cp -p /etc/init.d/init.ohasd /etc/init.d/init.ohasd.sav
$ cp -rp /etc/oracle /etc/oracle.sav
$ cp -p /etc/oratab /etc/oratab.sav
$ cp -p $GRID_HOME/root.sh $GRID_HOME/root.sh.sav
$ cp -p $ORACLE_HOME/root.sh $ORACLE_HOME/root.sh.sav
It worth to collect the configuration baseline of your system, it will help track/rollback the changes of OS & DB configurations, this script can help you out:
http://dba-tips.blogspot.com/2016/12/configuration-baseline-script-for-linux.html
Copy your scripts/crontab to the new environment.
Setup the monitoring of the new environment. you may be interested in this:
http://dba-tips.blogspot.com/2014/02/database-monitoring-script-for-ora-and.html
http://dba-tips.blogspot.com/2014/02/database-monitoring-script-for-ora-and.html
Application Switch over to the new 19c DB:
Within a minimal downtime window you perform do the following:
- Stop all applications connecting to the source 11g DB.
- Stop all the application services on the source 11g DB. [To make sure no application will connect to old 11g DB]
- Stop GoldenGate EXTRACT & PUMP processes on the source 11g DB server.
- Make sure all transactions are applied on the 19c DB.
- Stop GoldenGate REPLICATE process on the target 19c DB server.
- Enable Jobs & AQs on the target 19c DB server:
- Enable Jobs & AQs on the target 19c DB server:
SQL> ALTER SYSTEM SET aq_tm_processes=10 SCOPE=BOTH SID='*';
SQL> ALTER SYSTEM SET job_queue_processes=100 SCOPE=BOTH SID='*';
- Enable the triggers on 19c DB:
[Generate the script on the 11g database]
SQL> set pages 0
SQL> spool enable_triggers.sql
SQL> select 'alter trigger '||owner||'.'||trigger_name||' enable;' from dba_triggers where status='ENABLED' and owner in (select owner from GG_REP_SCHEMAS);
SQL> spool off
[Execute the script on the 19c database]
SQL> set pages 0
SQL> spool enable_triggers.log
SQL> @enable_triggers.sql
SQL> spool off
- Point your applications to connect to the 19c DB.
Question: If have dozens of application servers are currently connecting to the 11g DB how can I manage changing their connection string to connect to the 19c DB with the least downtime?
Answer: Let's suppose your applications are currently using rac1-scan which is connecting to the 11g DB as a hostname:
API =
(DESCRIPTION =
(ADDRESS = (PROTOCOL = TCP)(HOST = rac1-scan)(PORT = 1521))
(CONNECT_DATA =
(SERVER = DEDICATED)
(SERVICE_NAME = pssfztest_api)
)
)
Before the Switchover day, you will need to create a new DNS entry in your DNS e.g. DBCLUSTER it will resolve to rac1-scan (yes in DNS you can create a DNS name resolve to another DNS name) and set the TTL (Time to Live) value to 3 seconds or less, then change the HOST entry in all your Application server from rac1-scan to DBCLUSTER (which is already pointing to rac1-scan). During the switchover downtime window, In the DNS, you will simply point the DNS name DBCLUSTER to rac2-scan which is the scan name for the 19c database (in my scenario) instead of rac1-scan, and restart the application to divert current and new connections to the 19c DB.
In case you will need to enable the reverse replication from the 19c DB to the 11g DB (after the Switch over) you will need to implement the following steps within the same downtime window after stopping the REPLICAT on the 19c DB and before pointing your applications to the 19c DB:
On the 11g DB server create the directory where the 19c gg trail files will be shipped to:
$ mkdir -p /cloudfs/gg/ggdata_from19c/dirtmp
On the 19c DB enable GoldenGate DDL replication:
[By goldengate]
$ cd /cloudfs/gg/gghome
$ export ORACLE_SID=SPRINT1
$ sqlplus / as sysdba
[Run the following scripts respectively. When prompt, give GGOWNER as GoldenGate schema]
SQL> @marker_setup.sql
SQL> @ddl_setup.sql
SQL> @role_setup.sql
SQL> GRANT GGS_GGSUSER_ROLE TO GGOWNER;
SQL> @ddl_enable.sql
All EXTRACT parameter files should include the following line:
DDL INCLUDE MAPPED, OBJTYPE 'TABLE' &
On 19c DB server create EXTRACT group: [For REVERSE replication from 19c DB to 11g DB]
Note: FORMAT RELEASE 12.2 parameter will be added for backward compatibility replication with 12.2 goldenGate version at target. In case you are installing 19c goldenGate on both source and target you will not need to use this parameter.
$ vi /cloudfs/gg/gghome/dirprm/EXTTO11G.prm
EXTRACT EXTTO11G
SETENV (ORACLE_HOME="/u01/oracle/12.2.0.3")
SETENV (NLS_DATE_FORMAT="YYYY-MM-DD:HH24:MI:SS")
SETENV (GG_HOME="/cloudfs/gg/gghome")
USERID GGOWNER@SPRINT_19c, PASSWORD AADAAAAAAAAAAAJAKJTEZEIAJGJGOEIGVGZISABISIZBCEMDAAAAAAAAAAAAAAAAAAAAAAAAAAAAAAAA, encryptkey securekey1
TRANLOGOPTIONS DBLOGREADER
TRANLOGOPTIONS INCLUDEREGIONID
--TRANLOGOPTIONS EXCLUDEUSER GGOWNER
--THREADOPTIONS MAXCOMMITPROPAGATIONDELAY 20000
FETCHOPTIONS NOUSESNAPSHOT
STATOPTIONS REPORTFETCH
WARNLONGTRANS 5H, CHECKINTERVAL 30M
REPORTCOUNT EVERY 5 MINUTES, RATE
WILDCARDRESOLVE DYNAMIC
DISCARDFILE ?GG_HOME/dirrpt/EXTTO11G.dsc, APPEND, MEGABYTES 500
DISCARDROLLOVER AT 01:00 ON SUNDAY
DDL INCLUDE MAPPED
EXTTRAIL /cloudfs/gg/ggdata/TO11G/19, FORMAT RELEASE 12.2
Table APISEC.*;
Table CTRLINV.*;
Table PROS_USER.*;
Table P_FZ.*;
Table P_FZ_ADM.*;
Table P_FZ_ADMIN.*;
Table P_FZ_APISEC.*;
Table P_FZ_APP.*;
Table P_FZ_ARCH.*;
Table P_FZ_CRYPT.*;
Table P_FZ_DA.*;
Table P_FZ_FQ.*;
Table P_FZ_RPT.*;
Table P_FZ_SEC.*;
Table P_FZ_UDW.*;
Table RAFZPRDSEC_APP.*;
Table RAFZPRD_APP.*;
Table RAFZPRD_PFS.*;
Table RAFZPRD_RO.*;
Table RA_SUP.*;
Table SPRINT_BKP.*;
Table SPRINT_CONFIG.*;
Table SPRINT_CONFIG_APP.*;
Table SPRINT_IROPS.*;
Table SPRINT_IROPS_APP.*;
Table SPRINT_NPREFRESH.*;
Table SPRINT_PRICING_CONFIG.*;
Table SPRINT_PRICING_CONFIG_APP.*;
Table SPRINT_SCHED.*;
Table SPRINT_SCHED_APP.*;
GGSCI> dblogin USERID GGOWNER@PSSFZPRD_GGB, PASSWORD AADAAAAAAAAAAAJAKJTEZEIAJGJGOEIGVGZISABISIZBCEMDAAAAAAAAAAAAAAAAAAAAAAAAAAAAAAAA, encryptkey securekey1
GGSCI> ADD EXTRACT EXTTO11G, THREADS 2,TRANLOG, BEGIN NOW
GGSCI> ADD EXTTRAIL /cloudfs/gg/ggdata/TO11G/19 , EXTRACT EXTTO11G, MEGABYTES 100
GGSCI> START EXTRACT EXTTO11G
Create PUMP group: [For REVERSE replication from 19c DB to 11g DB]
$ vi /cloudfs/gg/gghome/dirprm/PMPTO11G.prm
EXTRACT PMPTO11G
SETENV (TGT_GGPATH="/cloudfs/gg/gghome")
PASSTHRU
RMTHOST 10.100.23.30 MGRPORT 7809
RMTTRAIL /cloudfs/gg/ggdata_from19c/19
Table APISEC.*;
Table CTRLINV.*;
Table PROS_USER.*;
Table P_FZ.*;
Table P_FZ_ADM.*;
Table P_FZ_ADMIN.*;
Table P_FZ_APISEC.*;
Table P_FZ_APP.*;
Table P_FZ_ARCH.*;
Table P_FZ_CRYPT.*;
Table P_FZ_DA.*;
Table P_FZ_FQ.*;
Table P_FZ_RPT.*;
Table P_FZ_SEC.*;
Table P_FZ_UDW.*;
Table RAFZPRDSEC_APP.*;
Table RAFZPRD_APP.*;
Table RAFZPRD_PFS.*;
Table RAFZPRD_RO.*;
Table RA_SUP.*;
Table SPRINT_BKP.*;
Table SPRINT_CONFIG.*;
Table SPRINT_CONFIG_APP.*;
Table SPRINT_IROPS.*;
Table SPRINT_IROPS_APP.*;
Table SPRINT_NPREFRESH.*;
Table SPRINT_PRICING_CONFIG.*;
Table SPRINT_PRICING_CONFIG_APP.*;
Table SPRINT_SCHED.*;
Table SPRINT_SCHED_APP.*;
GGSCI> ADD EXTRACT PMPTO11G, EXTTRAILSOURCE /cloudfs/gg/ggdata/TO11G/19
GGSCI> ADD RMTTRAIL /cloudfs/gg/ggdata_from19c/19, EXTRACT PMPTO11G, MEGABYTES 100
GGSCI> ALTER EXTRACT PMPTO11G, BEGIN NOW
GGSCI> START PMPTO11G
On the 11g DB Server create the REPLICAT process to apply the incoming gg trail files from the 19c DB:
Create the parameter file:
$ vi /cloudfs/gg/gghome/dirprm/REP19C.prm
REPLICAT REP19C
SETENV (ORACLE_HOME="/u01/app/oracle/product/11.2.0/dbhome_1")
SETENV (NLS_DATE_FORMAT="YYYY-MM-DD:HH24:MI:SS")
SETENV (GG_HOME="/cloudfs/gg/gghome")
USERID GGOWNER@SPRINT_11g, PASSWORD AADAAAAAAAAAAAJAKJTEZEIAJGJGOEIGVGZISABISIZBCEMDAAAAAAAAAAAAAAAAAAAAAAAAAAAAAAAA, encryptkey securekey1
ASSUMETARGETDEFS
DBOPTIONS DEFERREFCONST
--DBOPTIONS SUPPRESSTRIGGERS
DISCARDROLLOVER AT 01:00 ON Sunday
--WILDCARDRESOLVE DYNAMIC
--STATOPTIONS REPORTFETCH
REPORTCOUNT EVERY 5 MINUTES, RATE
DISCARDFILE ?GG_HOME/dirrpt/REP19C.dsc, APPEND, MEGABYTES 100
BATCHSQL
ALLOWNOOPUPDATES
--REPERROR (1403, DISCARD)
--REPERROR (-1, DISCARD)
--ddlerror 904 ignore
MAP APISEC.*, TARGET APISEC.*, COLMAP(USEDEFAULTS);
MAP CTRLINV.*, TARGET CTRLINV.*, COLMAP(USEDEFAULTS);
MAP PROS_USER.*, TARGET PROS_USER.*, COLMAP(USEDEFAULTS);
MAP P_FZ.*, TARGET P_FZ.*, COLMAP(USEDEFAULTS);
MAP P_FZ_ADM.*, TARGET P_FZ_ADM.*, COLMAP(USEDEFAULTS);
MAP P_FZ_ADMIN.*, TARGET P_FZ_ADMIN.*, COLMAP(USEDEFAULTS);
MAP P_FZ_APISEC.*, TARGET P_FZ_APISEC.*, COLMAP(USEDEFAULTS);
MAP P_FZ_APP.*, TARGET P_FZ_APP.*, COLMAP(USEDEFAULTS);
MAP P_FZ_ARCH.*, TARGET P_FZ_ARCH.*, COLMAP(USEDEFAULTS);
MAP P_FZ_CRYPT.*, TARGET P_FZ_CRYPT.*, COLMAP(USEDEFAULTS);
MAP P_FZ_DA.*, TARGET P_FZ_DA.*, COLMAP(USEDEFAULTS);
MAP P_FZ_FQ.*, TARGET P_FZ_FQ.*, COLMAP(USEDEFAULTS);
MAP P_FZ_RPT.*, TARGET P_FZ_RPT.*, COLMAP(USEDEFAULTS);
MAP P_FZ_SEC.*, TARGET P_FZ_SEC.*, COLMAP(USEDEFAULTS);
MAP P_FZ_UDW.*, TARGET P_FZ_UDW.*, COLMAP(USEDEFAULTS);
MAP RAFZPRDSEC_APP.*, TARGET RAFZPRDSEC_APP.*,COLMAP(USEDEFAULTS);
MAP RAFZPRD_APP.*, TARGET RAFZPRD_APP.*, COLMAP(USEDEFAULTS);
MAP RAFZPRD_PFS.*, TARGET RAFZPRD_PFS.*, COLMAP(USEDEFAULTS);
MAP RAFZPRD_RO.*, TARGET RAFZPRD_RO.*, COLMAP(USEDEFAULTS);
MAP RA_SUP.*, TARGET RA_SUP.*, COLMAP(USEDEFAULTS);
MAP SPRINT_BKP.*, TARGET SPRINT_BKP.*, COLMAP(USEDEFAULTS);
MAP SPRINT_CONFIG.*, TARGET SPRINT_CONFIG.*, COLMAP(USEDEFAULTS);
MAP SPRINT_CONFIG_APP.*, TARGET PRINT_CONFIG_APP.*,COLMAP(USEDEFAULTS);
MAP SPRINT_IROPS.*, TARGET SPRINT_IROPS.*,COLMAP(USEDEFAULTS);
MAP SPRINT_IROPS_APP.*, TARGET SPRINT_IROPS_APP.*,COLMAP(USEDEFAULTS);
MAP SPRINT_NPREFRESH.*, TARGET SPRINT_NPREFRESH.*,COLMAP(USEDEFAULTS);
MAP SPRINT_PRICING_CONFIG.*, TARGET SPRINT_PRICING_CONFIG.*,COLMAP(USEDEFAULTS);
MAP SPRINT_PRICING_CONFIG_APP.*, TARGET SPRINT_PRICING_CONFIG_APP.*,COLMAP(USEDEFAULTS);
MAP SPRINT_SCHED.*, TARGET SPRINT_SCHED.*,COLMAP(USEDEFAULTS);
MAP SPRINT_SCHED_APP.*, TARGET SPRINT_SCHED_APP.*,COLMAP(USEDEFAULTS);
Create the REPLICAT process from GGSCI console: [On 11g DB server]
[By goldengate]
GGSCI> dblogin USERID GGOWNER@SPRINT_11g, PASSWORD AADAAAAAAAAAAAJAKJTEZEIAJGJGOEIGVGZISABISIZBCEMDAAAAAAAAAAAAAAAAAAAAAAAAAAAAAAAA, encryptkey securekey1
GGSCI> ADD REPLICAT REP19C, EXTTRAIL /cloudfs/gg/ggdata_from19c/19
GGSCI> START REPLICAT REP19C
Steps to be carried out after the Switch Over to the 19c DB:
Gather Fixed/System Objects Statistics:
These two types of statistics need to be gathered while the DB is having a real/representative workload:
-- Fixed Object Statistics: [X$ tables]
SQL> EXECUTE DBMS_STATS.GATHER_FIXED_OBJECTS_STATS;
-- System Statistics: [CPU & IO]
-- This will gather statistics over 1 hour period:
SQL> EXECUTE DBMS_STATS.GATHER_SYSTEM_STATS('interval',60);
References:
Certification Information for Oracle Database on Linux x86-64 [1304727.2]
Release Schedule of Current Database Releases (Doc ID 742060.1)
Release Schedule of Current Database Releases (Doc ID 742060.1)
RAC and Oracle Clusterware Best Practices and Starter Kit (Platform Independent) (Doc ID 810394.1)
Oracle Linux: ORA-27301:OS Failure Message: No Buffer Space Available (Doc ID 2041723.1)
https://docs.oracle.com/en/database/oracle/oracle-database/19/ostmg/diskgroup-compatibility.html#GUID-9E283CAC-8359-4B4D-A9DE-3A9C52BCDD47
Oracle Linux: ORA-27301:OS Failure Message: No Buffer Space Available (Doc ID 2041723.1)
https://docs.oracle.com/en/database/oracle/oracle-database/19/ostmg/diskgroup-compatibility.html#GUID-9E283CAC-8359-4B4D-A9DE-3A9C52BCDD47
https://www.oracle.com/technetwork/database/options/clustering/applicationcontinuity/adb-continuousavailability-5169724.pdf
https://docs.oracle.com/en/database/oracle/oracle-database/18/spuss/check-for-sqlnet-allowed-logon-version-parameter-behavior.html#GUID-433E0DB9-026E-4322-A8FF-BA0E108AB28B
https://docs.oracle.com/en/database/oracle/oracle-database/12.2/tdprc/managing-workloads-using-database-services.html#GUID-59430519-270F-4C9A-921D-03BC611B5CFE
This is great. I really appreciate the huge efforts to make this guideline.
ReplyDeletehow can i make /cloudfs on 11g since ACFS is not supported , any help much appreciated
ReplyDeleteThe demonstration given in this article is following the best practice, but It's NOT MANDATORY for the filesystem holding goldengate installation/trail files to be shared between RAC nodes, you can just create a local filesystem on any of the RAC nodes (e.g. EXT4) and run goldengate from that node all the time.
Deletegreat article . is it viable for large db > 1tb as datapump export/import + flashback scn will be an issue
ReplyDeleteActually this article is based on a migration I've performed for a DB > 1TB.
DeleteI agree for example very large db >6 tb + busy db + downtime is minimal, then datapump will not be an option . in that case what should be the approach
ReplyDeleteIf the storage speed cannot help you with this scenario, then you may consider other lengthy routes, like getting this datapump from a standby DB (after switching it to SNAPSHOT mode). Goldengate also has its own initial load mechanism, honestly, I didn't use it before; you may need to explore this option as well.
ReplyDeletehello ,ENABLE_GOLDENGATE_REPLICATION parameter is for 11.2.0.4 and later and it don't exist in 11.2.0.3. is it correct ?
ReplyDeleteThanks for your comment. Exactly ENABLE_GOLDENGATE_REPLICATION is not exist in 11.2.0.3, it needs to be set on the target DB side which is 19c.
DeleteGreat Article Mahmoud you are a shining star, keep up the great work.
ReplyDeleteAny example to use GoldenGate to downgrade or it's more or less the same steps? :-)
ReplyDeleteThanks for passing by. For downgrade, yes, you can follow the same steps.
Delete